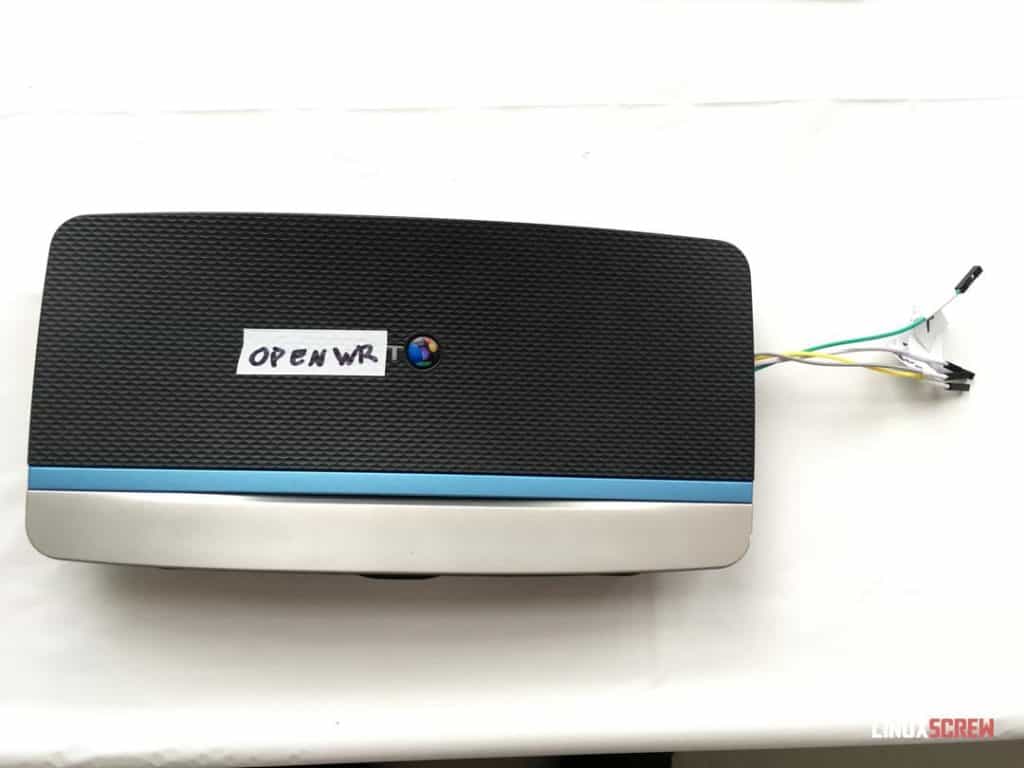
This article documents my success in getting the OpenWrt operating system up and running on a BT HomeHub 5A (also sold as the Plusnet Hub One). This was checked with the latest version of OpenWRT as of early 2021, so it’s up to date and ready to do some networking.
Once you’ve got an OpenWrt device set up, you can start mucking around with a bunch of useful computer networking concepts and tools like ad blockers and segregated networks – I’ll explore some common usage in future articles.
This tutorial is specific to the BT HomeHub 5 Type A – but if you can find a device on the OpenWrt wiki (and recent releases of OpenWrt are supported on it) – you can follow the steps listed there to flash your device.
This tutorial aims to show how cracking devices and loading OpenWrt onto them isn’t nearly as daunting as the OpenWrt wiki makes it seem.
You can also skip the hacking and use a Raspberry Pi! I cover this later in the article; scroll past the HomeHub stuff.
Follow this guide at your own risk – you could brick your router – so make sure you use a spare.
All credit for this stuff really goes to the people at the OpenWrt project. They cracked the devices, wrote the code, and figured it out – I’m just relaying the steps they created with some minor tweaking and explanation.
What is OpenWRT?
OpenWRT is a Linux-based operating system designed to be run on routers and other embedded devices. It’s a full computer OS so you can do whatever you want with it, but its primary use (and the purpose of most of the tools and interfaces that ship with it by default) is for networking.
OpenWrt can be set up as a router, WiFi hotspot, managed switch, file sharing server – it has many tools for managing these services that go above and beyond what your generic off-the-shelf router can do.
In this article and in the OpenWrt documentation, you’ll see the occasional reference to LEDE – this is just the OpenWrt Project’s former name.
Some OpenWrt highlights:
- Create multiple WiFi networks
- Segregate networks, keeping untrusted devices separate from your own
- Captive portal – run a WiFi hotspot that requires login using a web form (good for cafes!)
- Firewall and ad blocker – keep your network secure
- Much, much more – I’ll start covering the above and more in future articles, using this project as a jumping-off point to building the ultimate home lab setup
What You’ll Need:
- BT HomeHub 5 Type A (and only Type A!) can be found on eBay for about 10 quid. Please don’t buy a pre-flashed one; it’s no fun, and you don’t know what the seller could have loaded on there.
- USB serial adapter PL2302HX – these are cheap, and Linux compatible
- A Linux computer to do all this stuff from
- I used Pop!_OS, but steps should work on any modern Linux OS like Ubuntu or Arch.
- Jumper wires (aka breadboard wires) – these wires have male and female connectors, making them good for adding a serial port to the router, which can be disconnected when the job is done
- Soldering iron
- Electrical tape
- USB Stick
- Ethernet Cable
Why a BT HomeHub 5A?
- For a start, it’s compatible with OpenWrt.
- Ubiquitous and cheap – you can get them on eBay for under a tenner
- Lots of network ports
- A USB port for extra storage
- WiFi too
- Built-in ADSL modem if you want to use it to replace your home router completely
- Breaking into it will be F U N
Overview of the Steps Ahead
Here’s an overview of what all of the stuff below is actually doing:
- Adding a serial port to the router so that custom software can be loaded to it
- Sending a custom bootloader over to the router via the serial connection
- Using that bootloader to load the OpenWrt operating system installer to the router over an ethernet connection using TFTP
- Installing OpenWrt
Hacking The Hardware
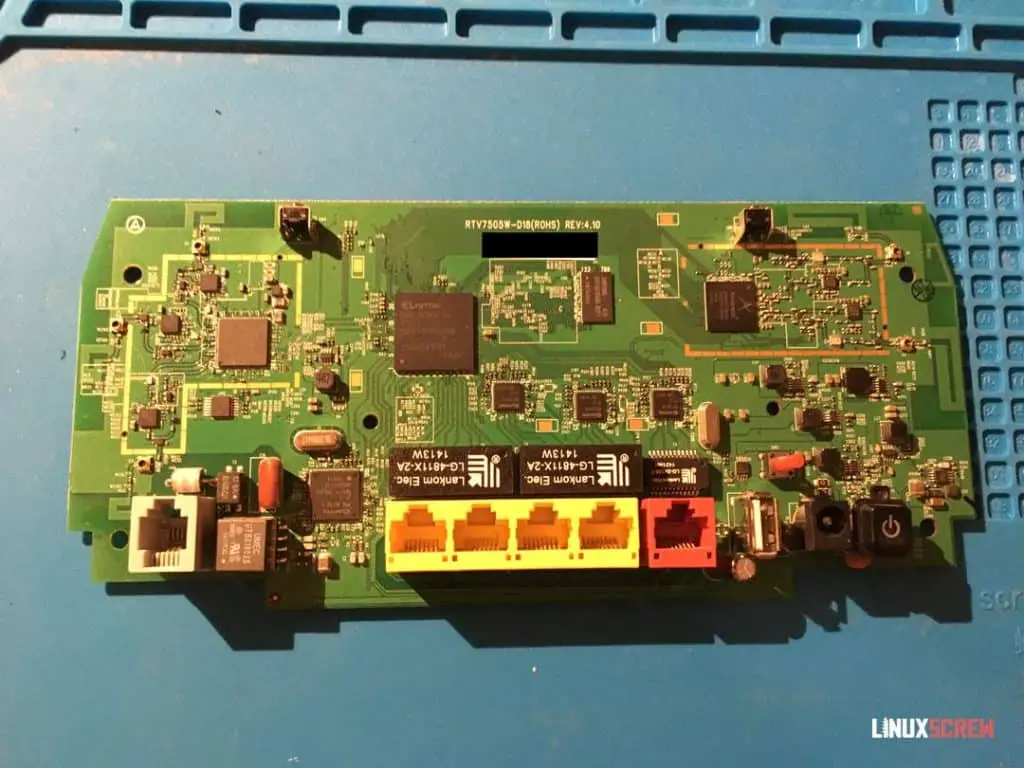
First, a quick tour of the router:
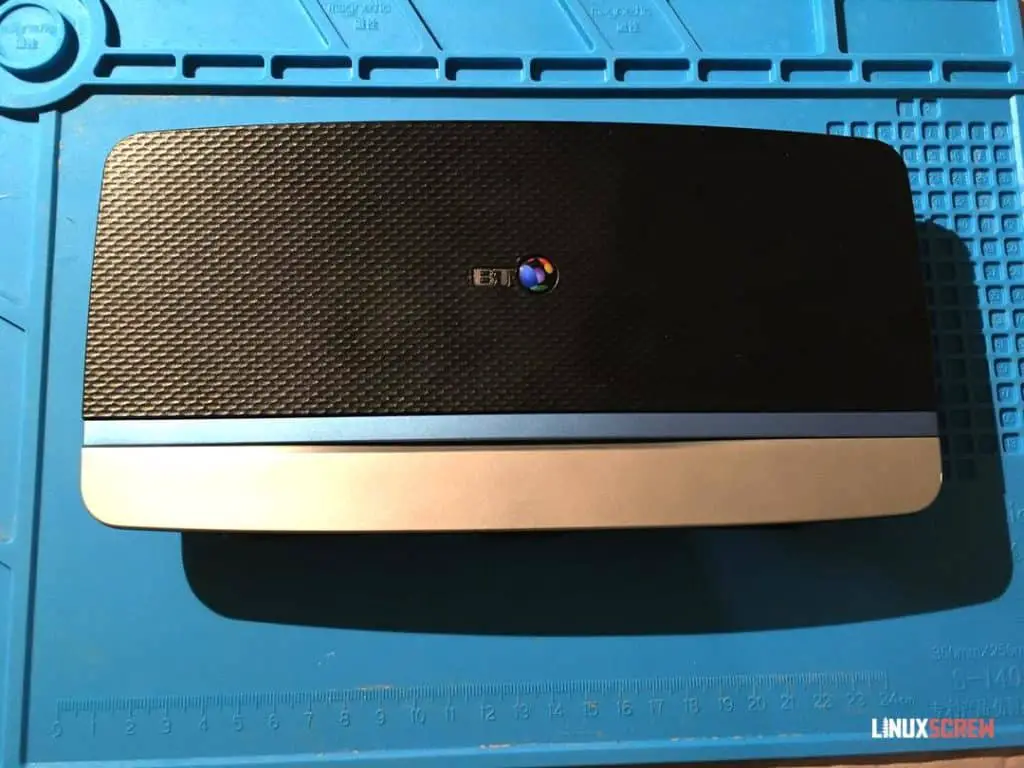
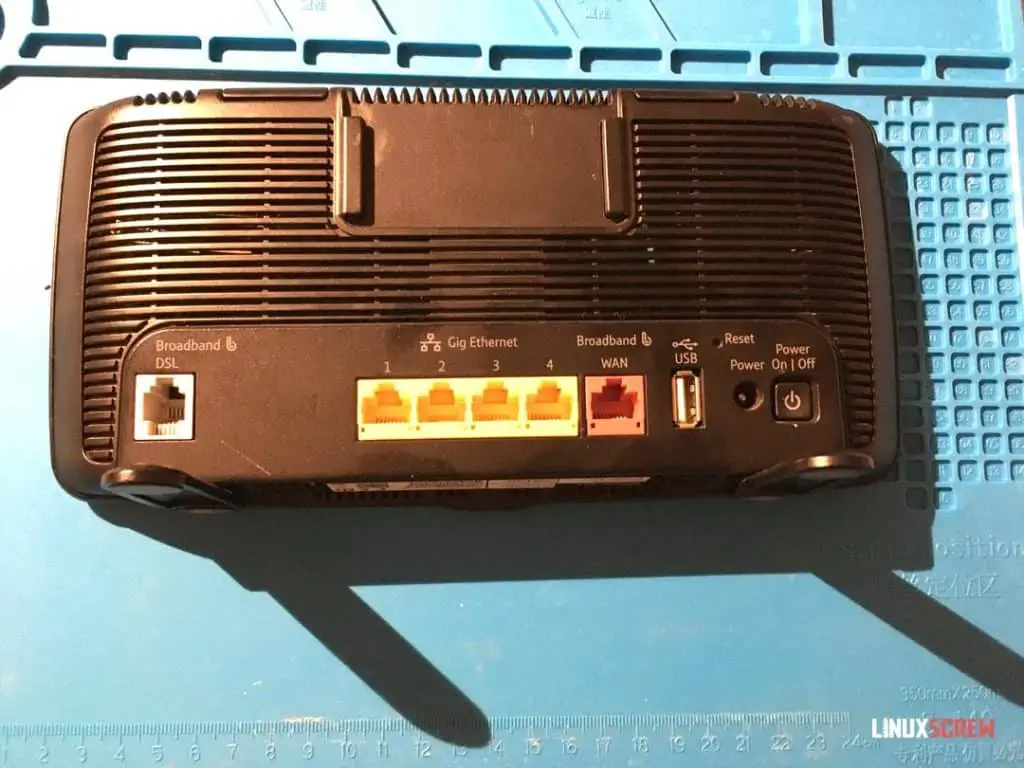
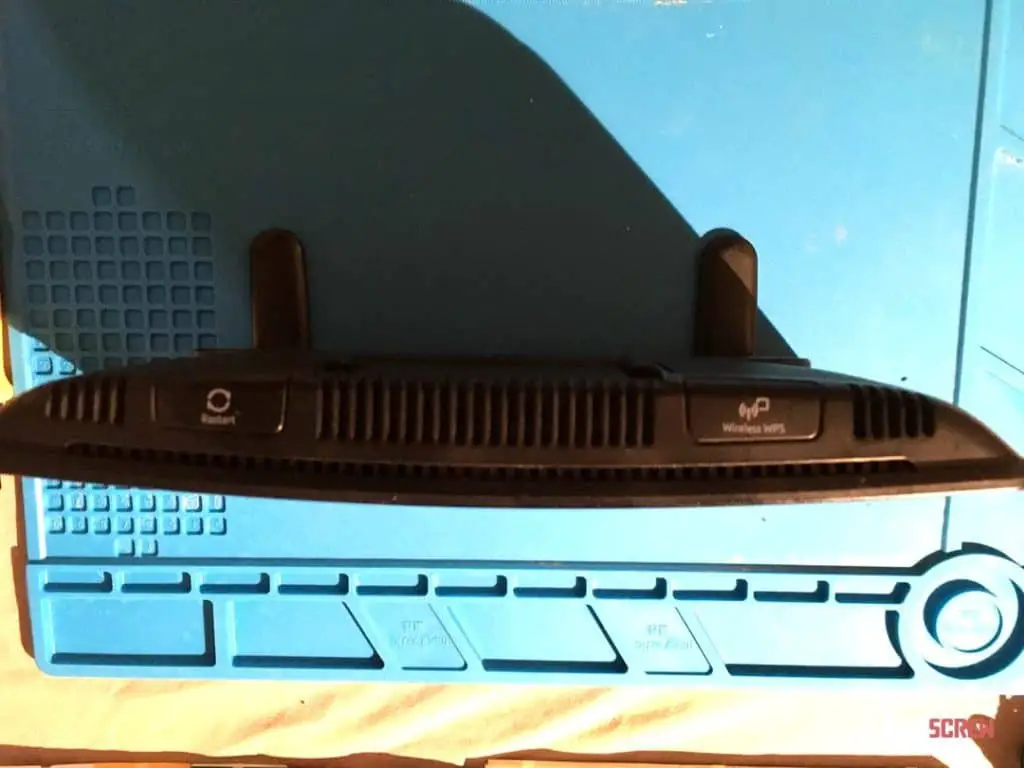
Moving on.
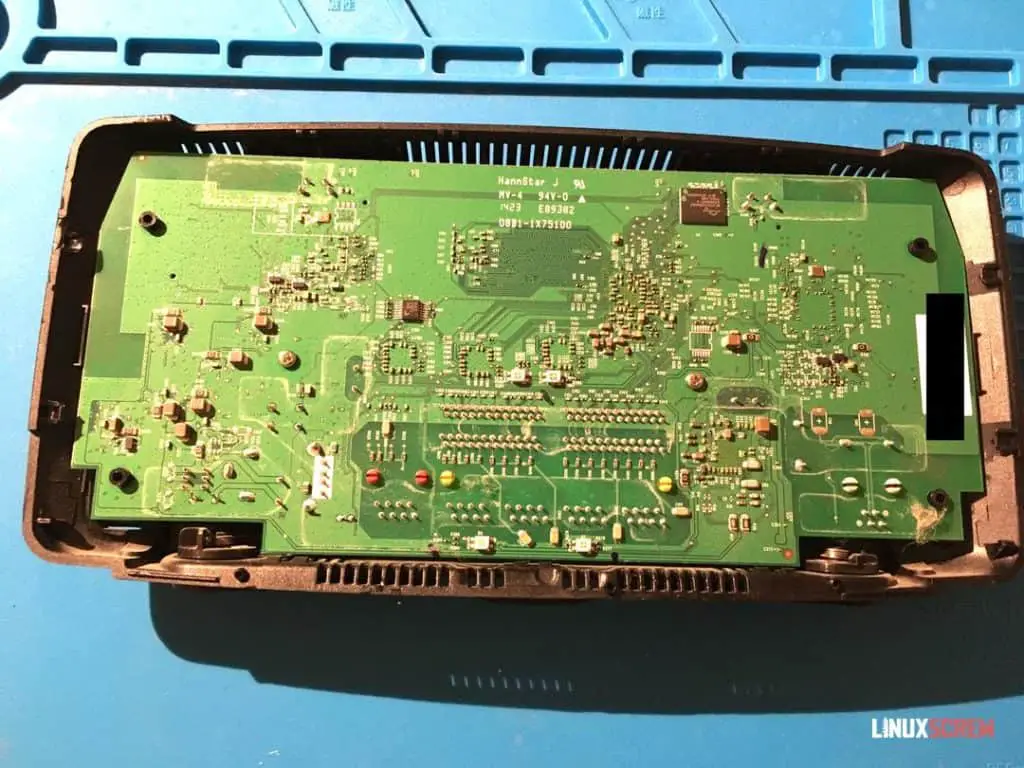
Opening the Router
Opening the router is not fun. Use a credit card or prying tool to work around the edges until it comes loose.
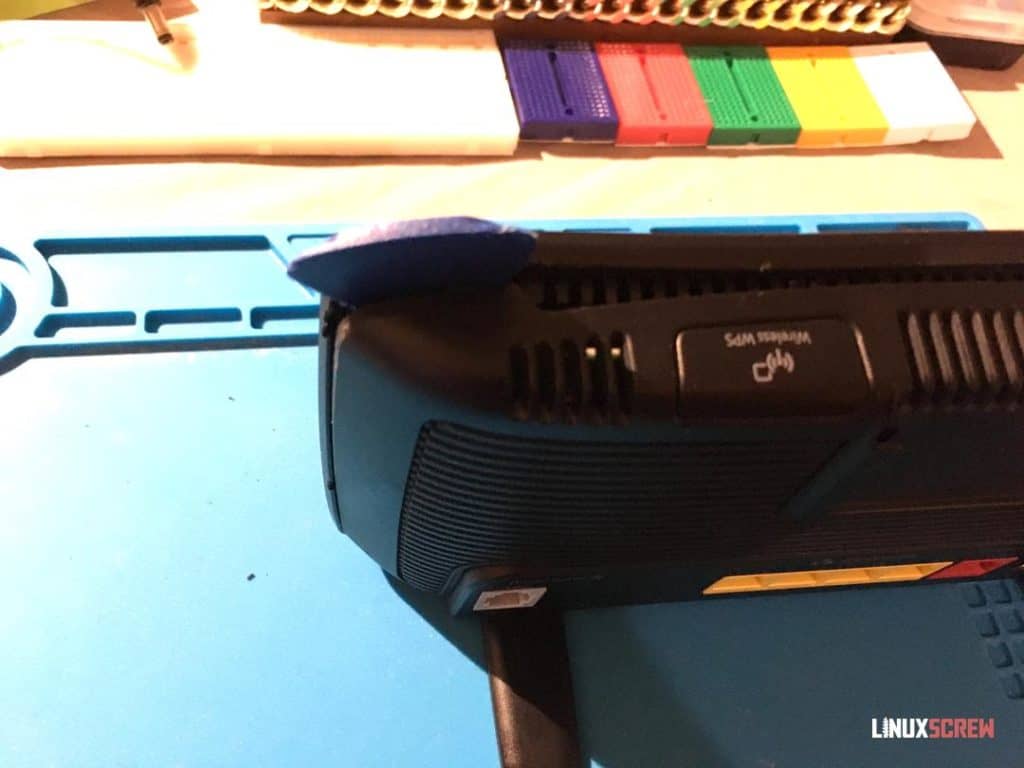
Starting at the corners is easiest. You’ll eventually find a spot that gives way.
You might break some clips while doing it. As far as I’m concerned, this isn’t a bad thing as it’ll make it easier to open next time.
Adding a Serial Port
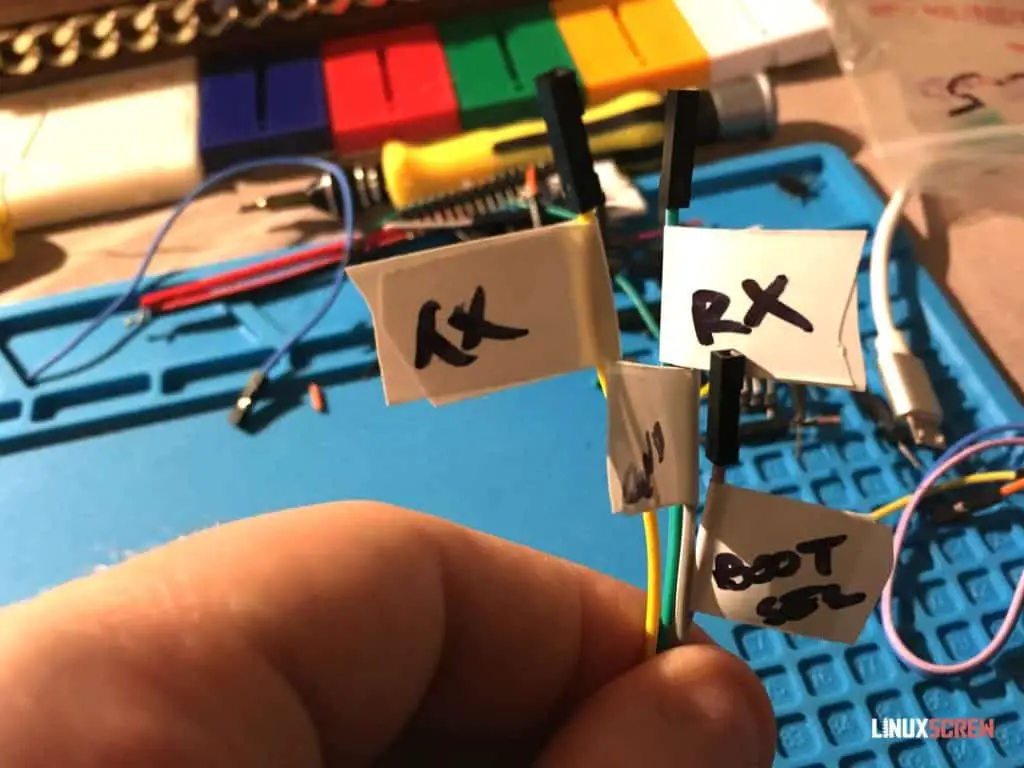
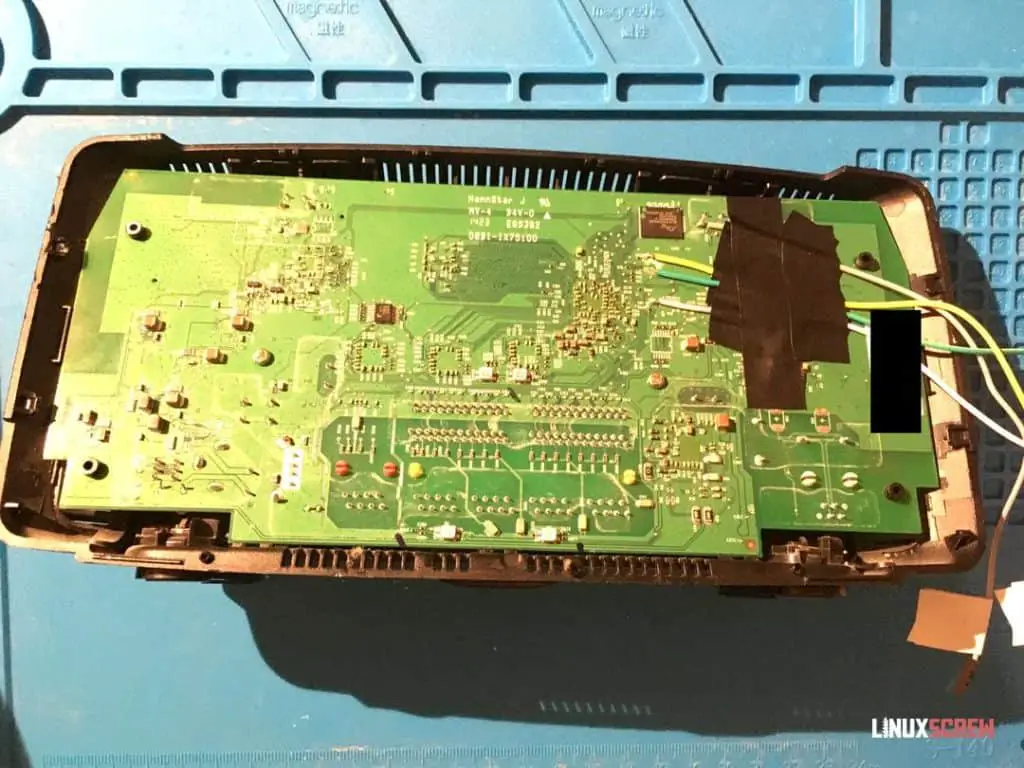
Four jumper wires need to be soldered to add the serial port to the router.
These are all soldered to the front of the circuit board – the side without the ethernet ports.
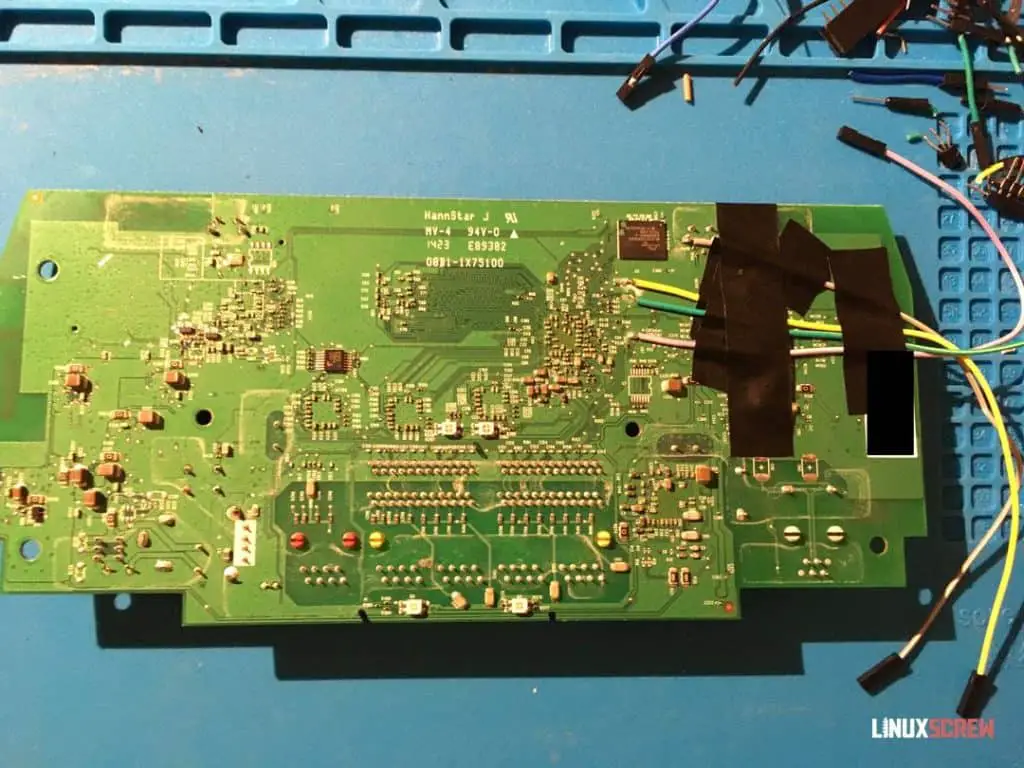
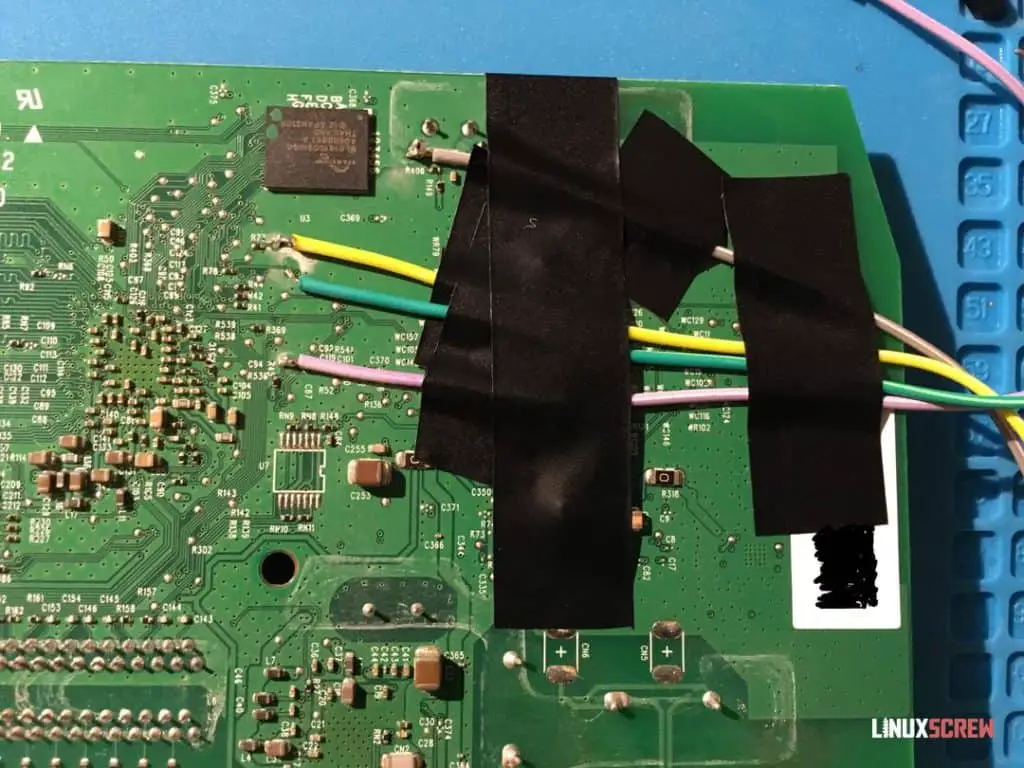
Each jumper wire has had the male end lopped off and been soldered to a solder pad on the board.
The photo above shows the locations for these solder pads, and the below table gives more detailed info on exactly what to solder to.
| Resistor Number (Labelled onboard) | Wire in Photo | Function | Info |
|---|---|---|---|
| R77 | Yellow | Serial TX | Below NAND flash. Use solder pad right of it. |
| R78 | Green | Serial RX | Directly below R77, to the left. Use solder pad to the right of it. |
| R45 | Purple | boot_sel2 | Below R78 to the right. Use solder pad above it. |
| GND | Brown | Use solder pad for WPS switch closest to NAND flash. |
Additional photos of the solder pads can be found on the OpenWrt wiki, here.
Putting it Back Together
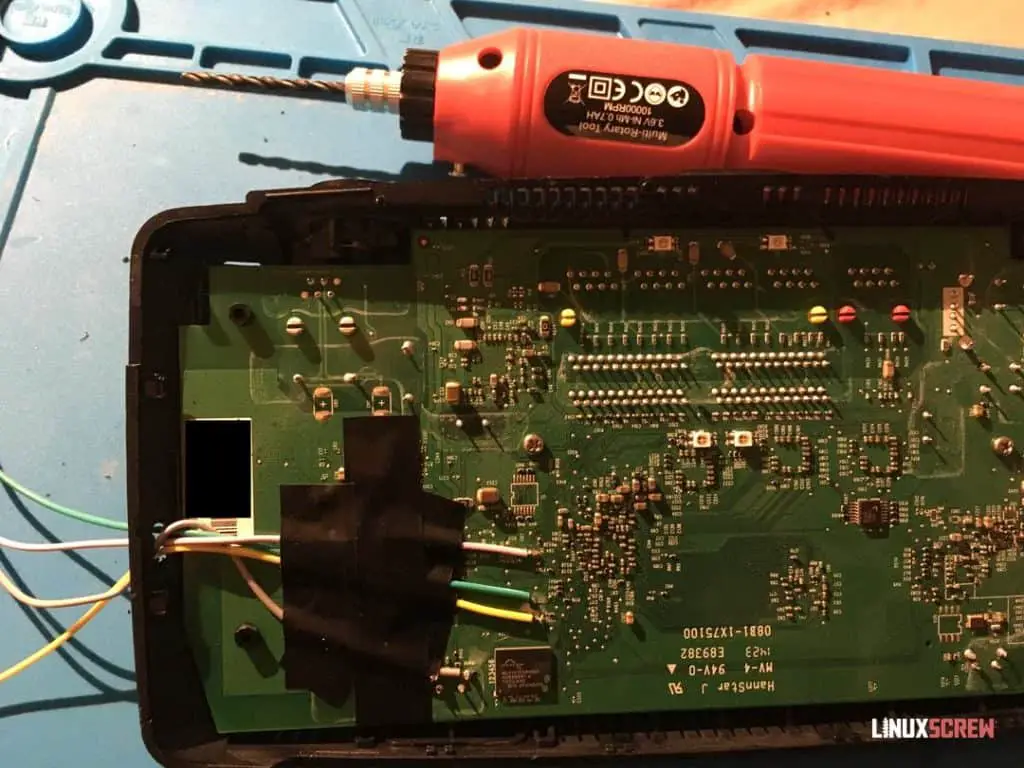
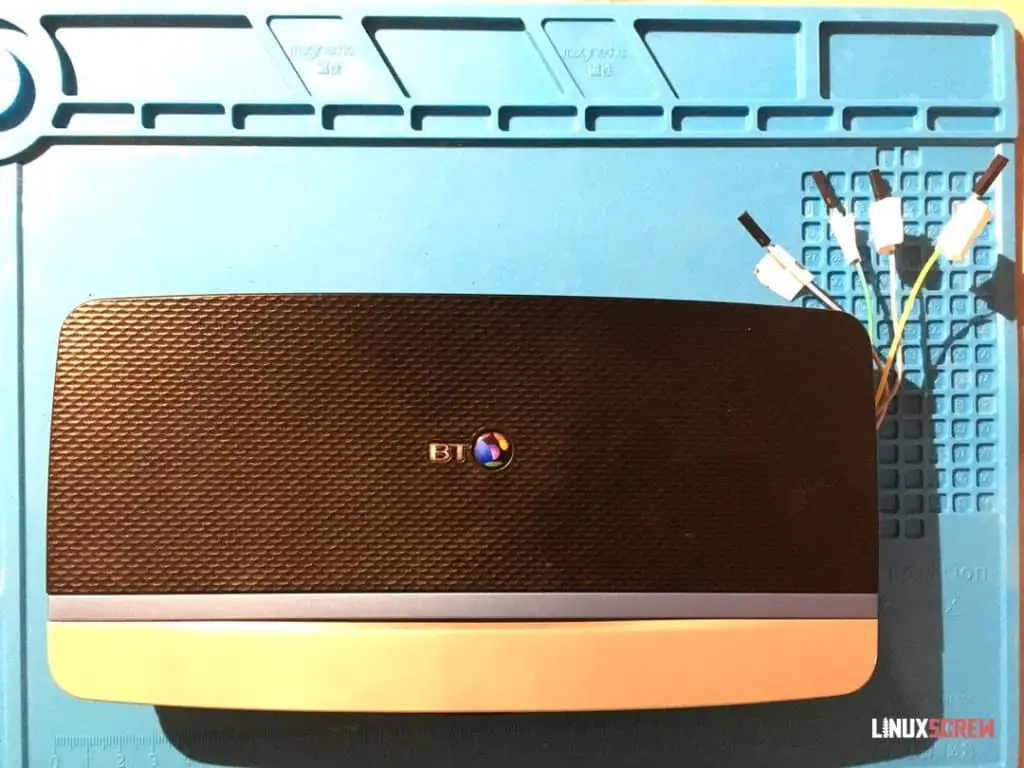
I’ve drilled a hole to pass the wires through to make them available after closing the case.
Just in case I have to access them later, it’ll save trying to pry that case open again.
With the serial port added, it’s now possible to load OpenWrt onto the HomeHub.
Connecting the Serial Port
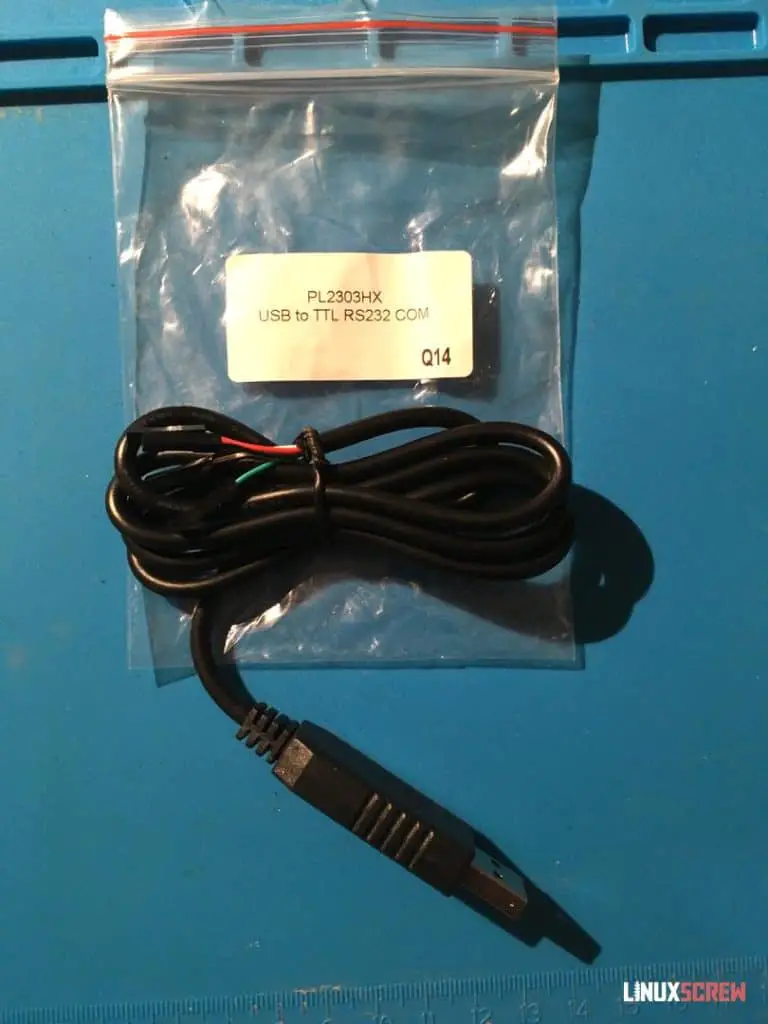
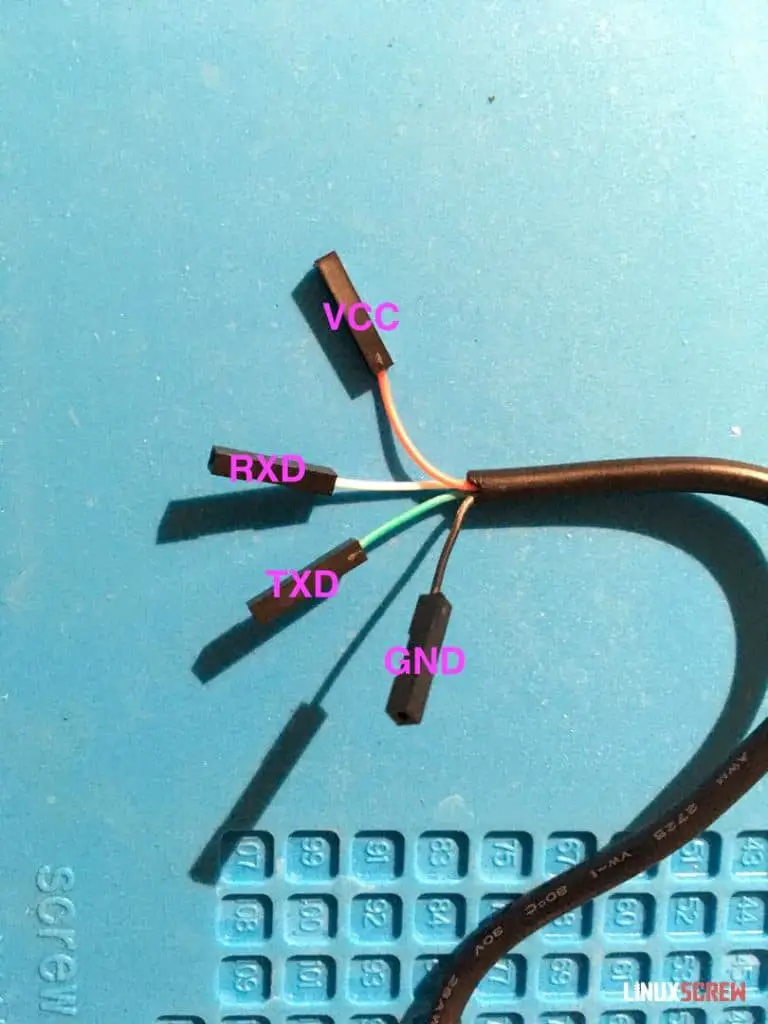
This adapter comes with the same kind of jumper wire pins I’ve soldered to the board, so they’ll just slot together.
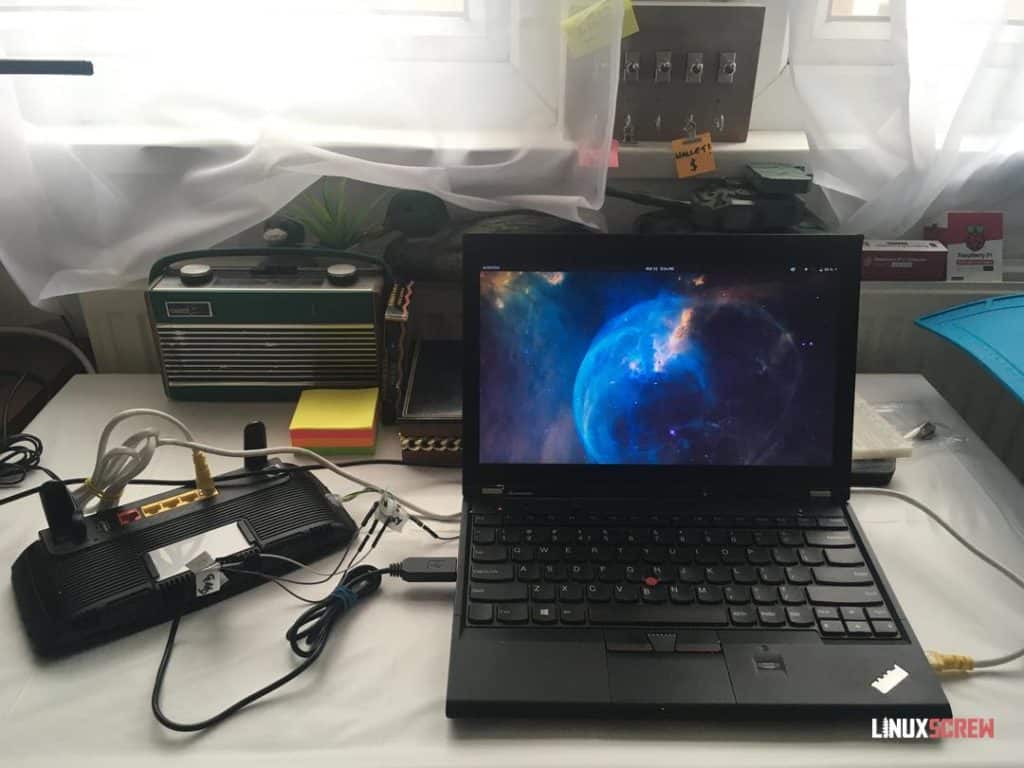
Connect the serial adapter to the router using the newly soldered port.
- Ground (GND) connects to ground.
- TX on the router connects to RX on USB serial adapter
- RX on the router connects to TX on USB serial adapter
- Leave boot_sel2 disconnected
Connect an ethernet cable from your computer to the first yellow port on the router as well.
Accessing the Router over the Serial Port
Now that everything’s connected, we can use picocom – a terminal application for Linux to connect to the router.
Install picocom using apt:
sudo apt update

sudo apt install picocom
The lsusb command can then be used to make sure that the USB to serial adapter has been detected:
lsusb
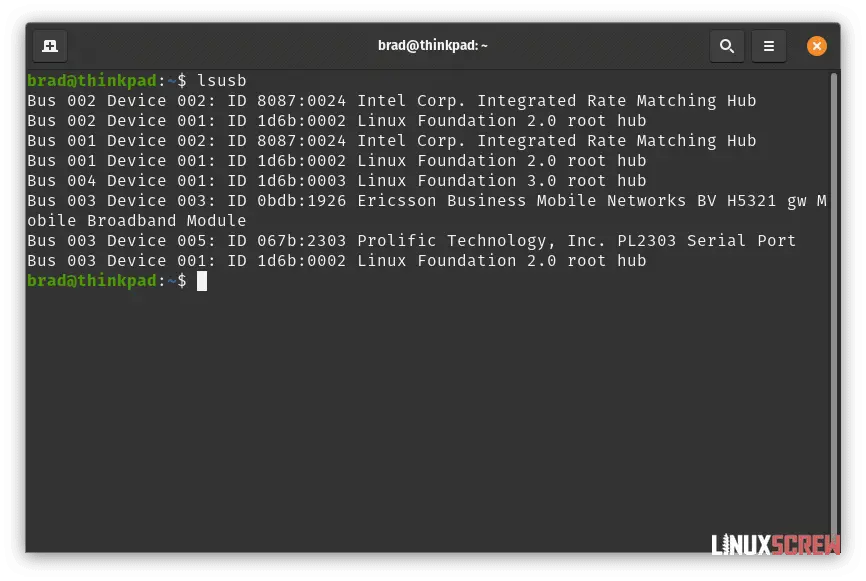
Find out where the USB adapter is located on your system using demesg, which outputs recent messages from the system, and tail, which restricts output to the last few lines:
sudo dmesg | tail
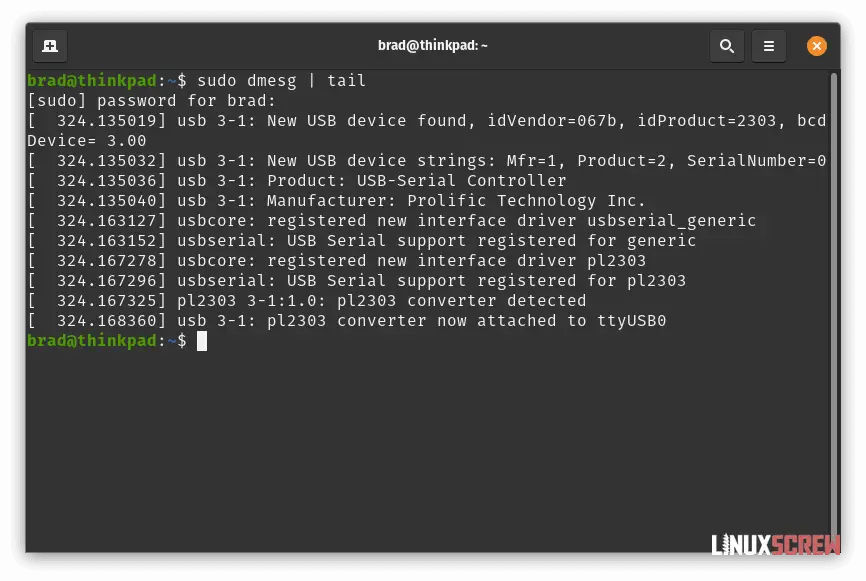
Connect to the serial device using picocom and the location given by dmsg:
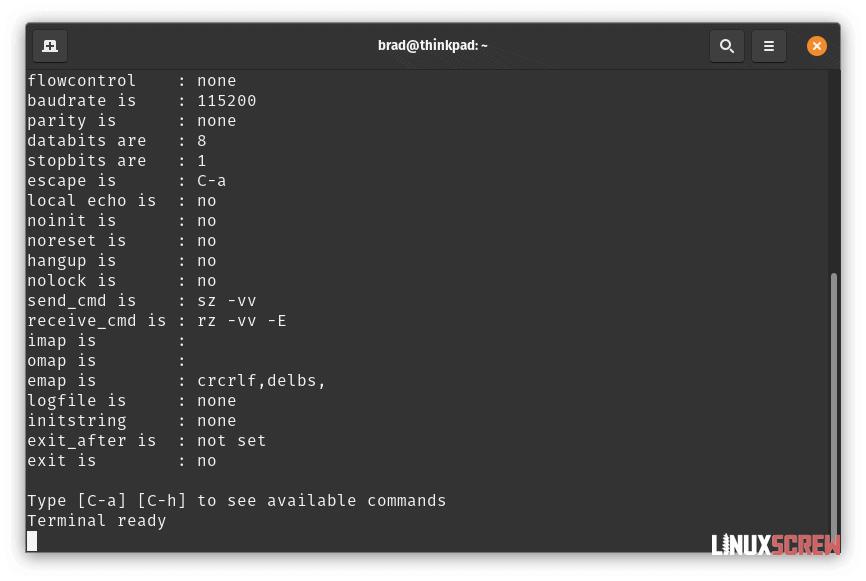
picocom -b 115200 /dev/ttyUSB0
When the connection is ready to use, you’ll see:
Terminal ready
To skip normal boot and give us the ability to boot our own firmware, we need to ground the boot_sel2 wire we added above.
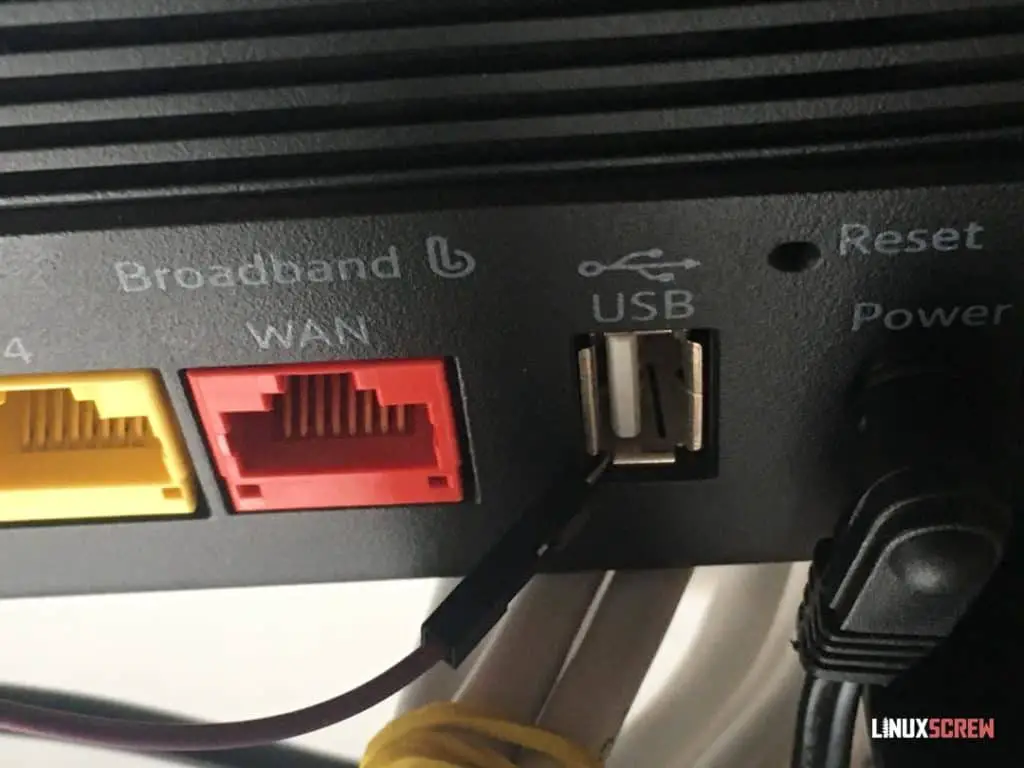
To easily ground boot_sel2, touch the outside of the USB plug as shown.
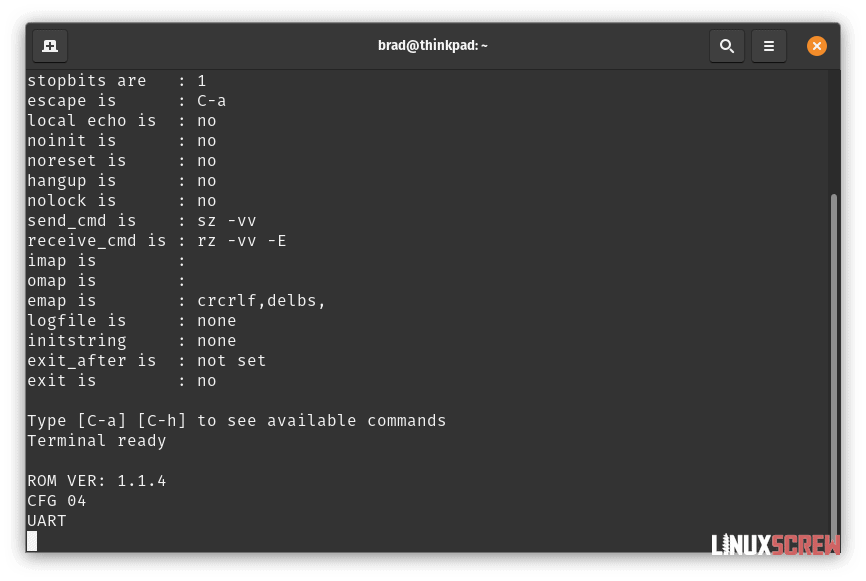
Short boot_sel wire to ground and power up the router, and you should see the following output in picocom:
ROM VER: 1.1.4
CFG 04
UART
If you see something like:
ROM VER: 1.1.4
CFG 06
NAND
NAND Read OK

DDR autotuning Rev 0.3d
DDR size from 0xa0000000 - 0xa7ffffff
DDR check ok... start booting...
You’ve failed to ground the boot_sel pin properly.
Once you’ve seen the UART message, you can un-ground the boot_sel pin.
Loading the Bootloader onto the Router
Head on over to the OpenWrt page for the HomeHub 5A and scroll to the download section:
https://openwrt.org/toh/bt/homehub_v5a#downloads
Download the following file:
lede-lantiq-bthomehubv5a_ram-u-boot.asc
Note that file names may have changed on the OpenWrt site, but they will be the ones with the closest names to what I’ve written.
Now, stream the downloaded file to the HomeHub over your serial connection using the cat program:
cat lede-lantiq-bthomehubv5a_ram-u-boot.asc > /dev/ttyUSB0
You can do this in a new terminal with picocom still running in the other.
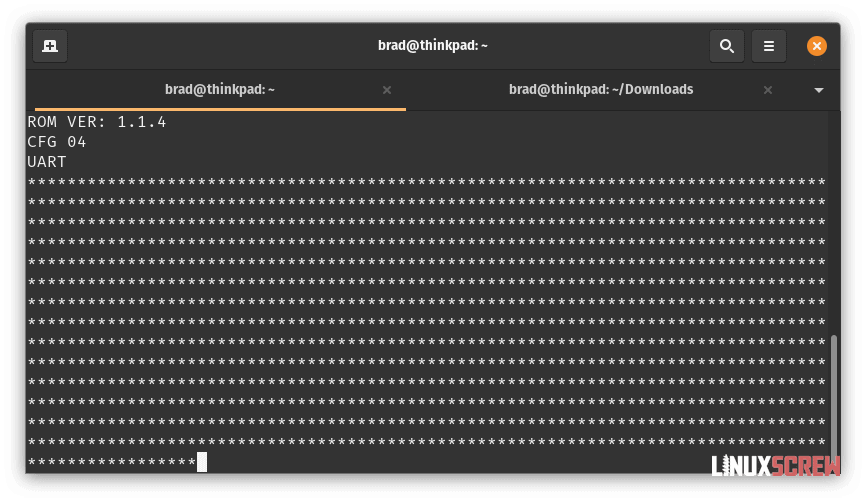
Head back to your picocom window, and you’ll see a bunch of * as the file is streamed across the serial connection.
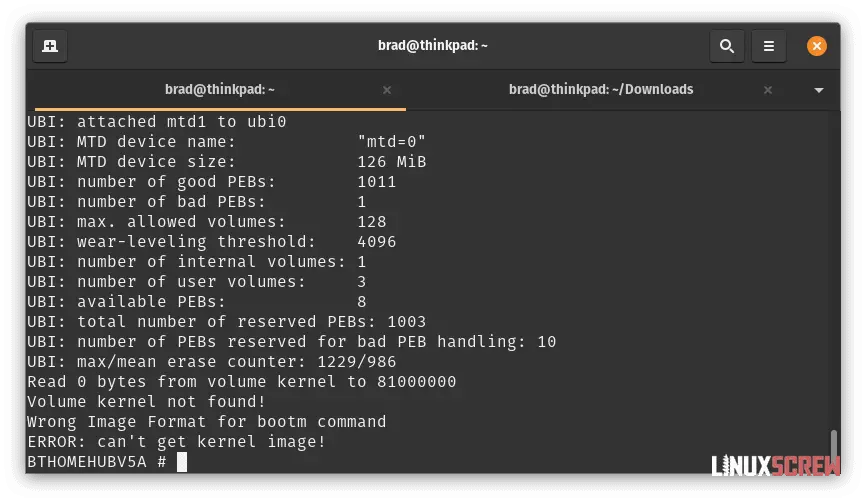
When it’s done, you should see something like this in the picocom window – don’t worry about those errors for now. The bootloader is ready.
Serving the OpenWrt Install Image to the HomeHub using TFTP
TFTP (Trivial File Transfer Protocol) is commonly used by small devices to load software. It’s a dumb file transfer program that doesn’t require a lot of resources.
Install the tftpd TFTP service by running the following on your Linux machine (not the router):
sudo apt install tftpd-hpa
You can confirm that it is running using:
sudo systemctl status tftpd-hpa
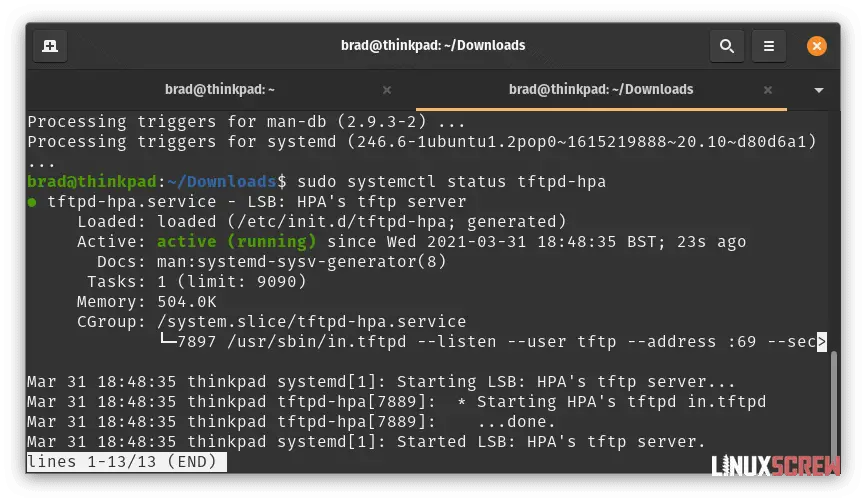
You’ll see it running per the below screenshot.
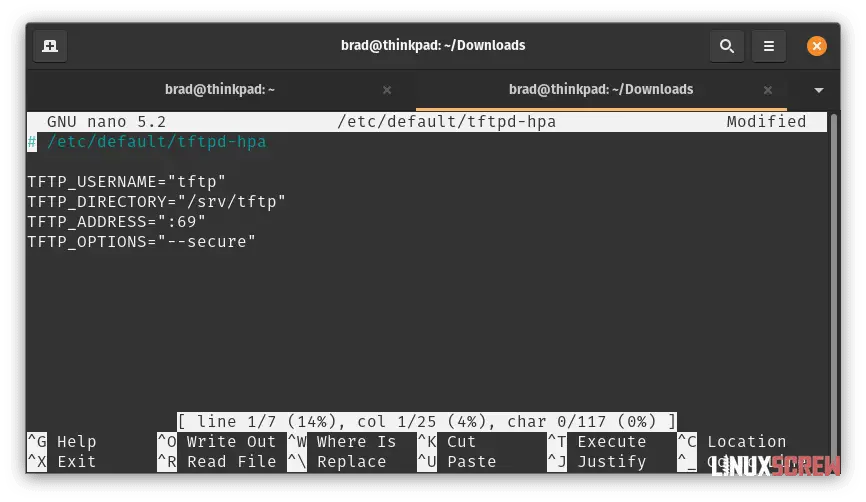
The configuration file for tftpd is located at
/etc/default/tftpd-hpa
There’s no need to modify it, but take note of the contents – particularly the directory in use:
/srv/tftp
This is where we need to put files that will be served over tftpd.
Next, the OpenWrt install image needs to be downloaded, again from
https://openwrt.org/toh/bt/homehub_v5a#downloads
Grab the file named
lede-lantiq-xrx200-BTHOMEHUBV5A-installimage.bin
and copy it to /srv/tftp:
sudo cp lede-lantiq-xrx200-BTHOMEHUBV5A-installimage.bin /srv/tftp/
The tftpd server and install image are now ready.
The HomeHub will assume an IP address of:
192.168.1.1
…and will assume the TFTP server it needs to connect to will have an IP address of
192.168.1.2
So, let’s give my laptop the latter IP address (this will be applicable until the next reboot – the ip address add command is not permanent)
sudo ip address add 192.168.1.2/24 dev enp0s25
enp0s25 is the name of my ethernet adapter – find yours by running:
ip link show
you can confirm with:
ip addr show
Or, you can use the control/settings panel on your system.
Now that both your computer and the router will be able to see each other over the ethernet connection, you can run the following on the serial terminal to the HomeHub to start loading the install image via TFTP:
tftpboot lede-lantiq-xrx200-BTHOMEHUBV5A-installimage.bin; bootm
And watch it go!
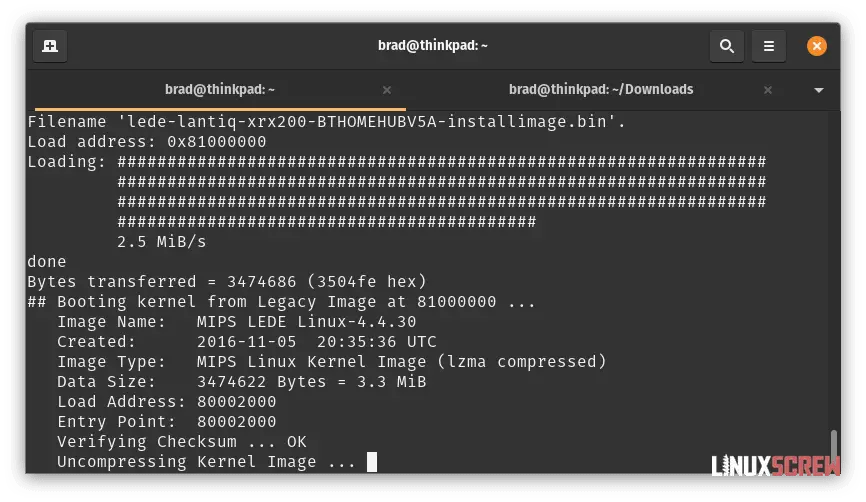
It’ll pause while decompressing for a bit.
When it’s ready, you’ll see
Please press Enter to activate this console.
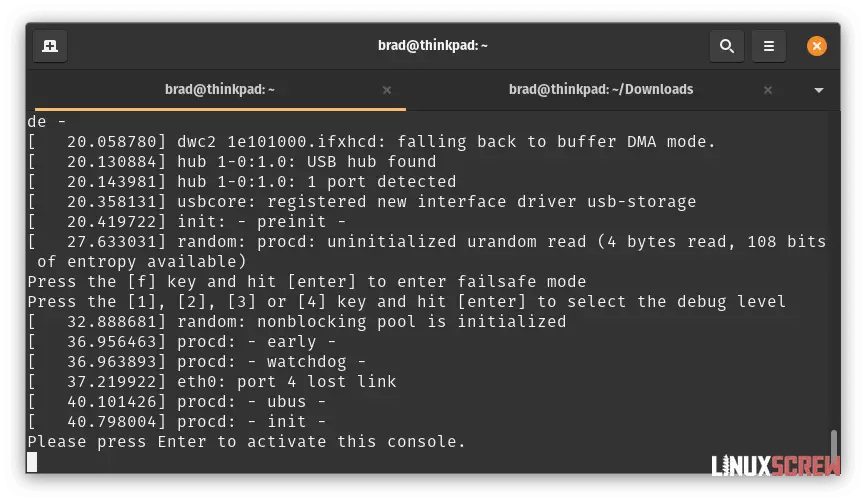
So, press enter! You’ll get the following generated installation guide:
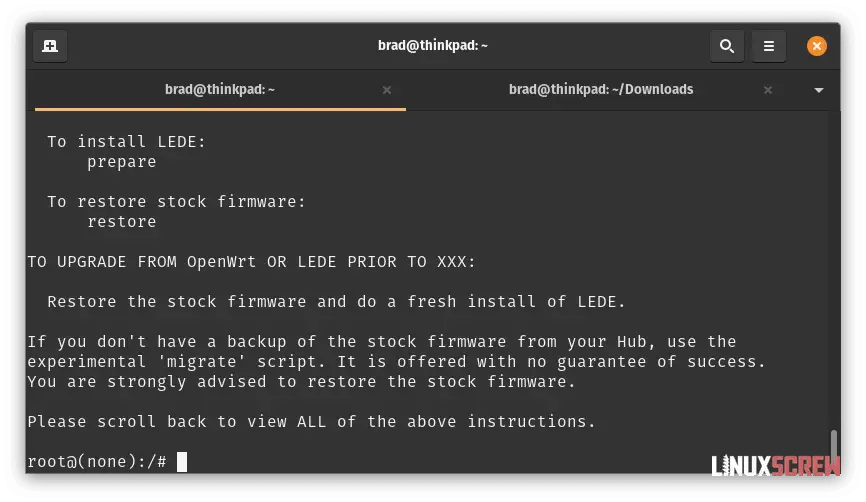
*******************************************************************************
*    Guide for installing LEDE onto a BT Home Hub 5 Type A/Plusnet Hub One    *
*******************************************************************************

You need an USB flash drive with at least 512MB free capacity, formatted as
FAT32 or exFAT, attached to the Hub. The attached flash drive will be
accessible at /tmp/mounts/<directory>.

To install LEDE, the USB flash drive must have a copy of the file:
lede-lantiq-xrx200-BTHOMEHUBV5A-squashfs-sysupgrade.bin

To restore the stock Firmware, the USB flash drive must have a have a copy
of the nanddump backup file (hh5a.nanddump) containing the stock Firmware.

LIST OF COMMANDS

To create a backup of the installed firmware (Take care to not overwrite
any previously made backup):
    nanddump --file /tmp/mounts/<directory>/hh5a.nanddump /dev/mtd4

To install LEDE:
    prepare

To restore stock firmware:
    restore

TO UPGRADE FROM OpenWrt OR LEDE PRIOR TO XXX:

Restore the stock firmware and do a fresh install of LEDE.

If you don't have a backup of the stock firmware from your Hub, use the
experimental 'migrate' script. It is offered with no guarantee of success.
You are strongly advised to restore the stock firmware.

Please scroll back to view ALL of the above instructions.
Don’t start following it – this article does things a bit differently.
Downloading The OpenWrt Operating System
Download the latest release of the OpenWrt OS itself from the page at:
https://openwrt.org/toh/bt/homehub_v5a#downloads
As of writing, this is
openwrt-19.07.7-lantiq-xrx200-bt_homehub-v5a-squashfs-sysupgrade.bin
This may not appear in the main downloads area on that page – scroll down!
Copy this file to a FAT32 formatted USB stick – don’t change the filename!
Backing up the Existing Router Firmware (Important)
Attach the USB stick to the HomeHub.
Once plugged in, you’ll see the following in your picocom window:
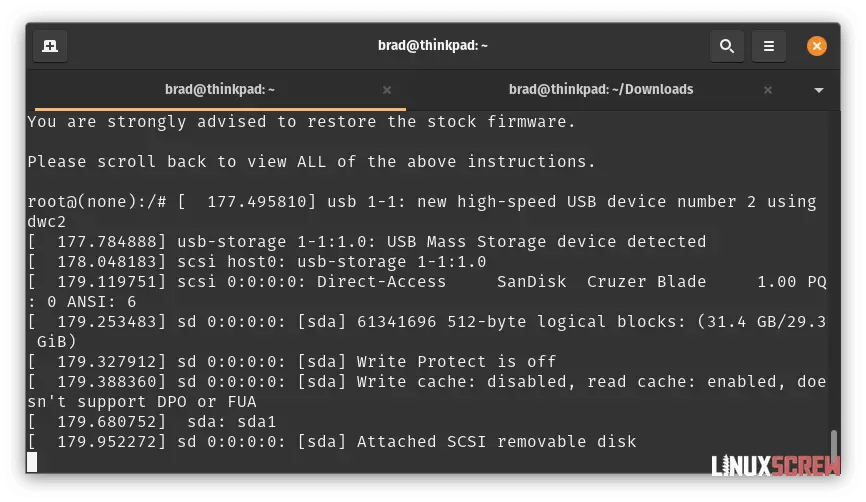
As the generated guide above mentioned, you need to run:
nanddump --file /tmp/mounts/<directory>/hh5a.nanddump /dev/mtd4
…to backup the stock firmware (note /dev/mtd4 may be different on your HomeHub – check the instructions generated for your device!).
<directory> will also differ for your device and USB stick – run:
ls /tmp/mounts
…to find out what it should be.
Once the above command is run, you might be waiting around for 10 minutes for things to complete.
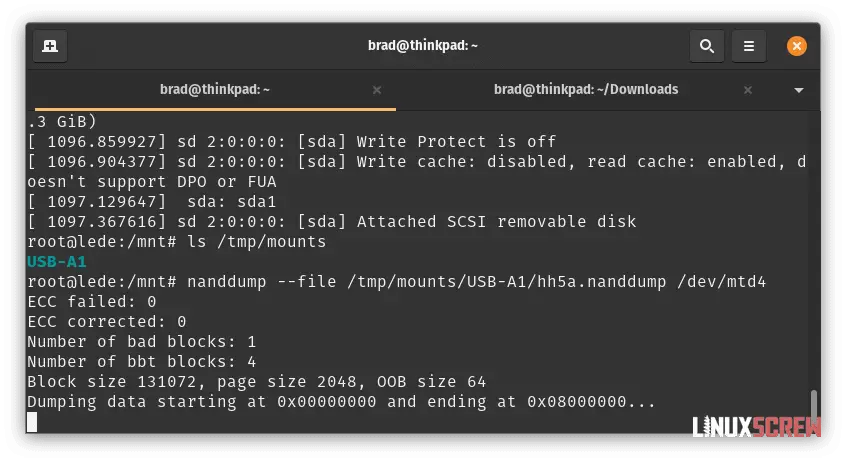
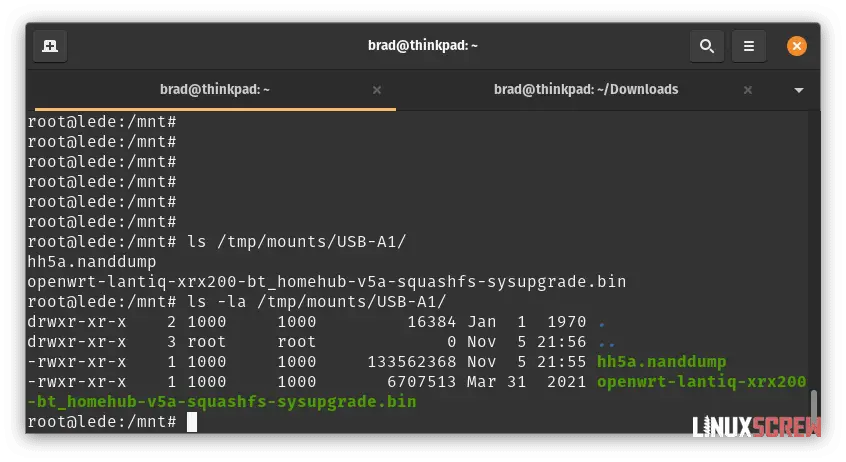
After the dump is done, we need to make sure it is at least 128MB in size – if it isn’t something went wrong, try again:
ls -la /tmp/mounts/<directory>/
Installing the New OpenWrt Firmware
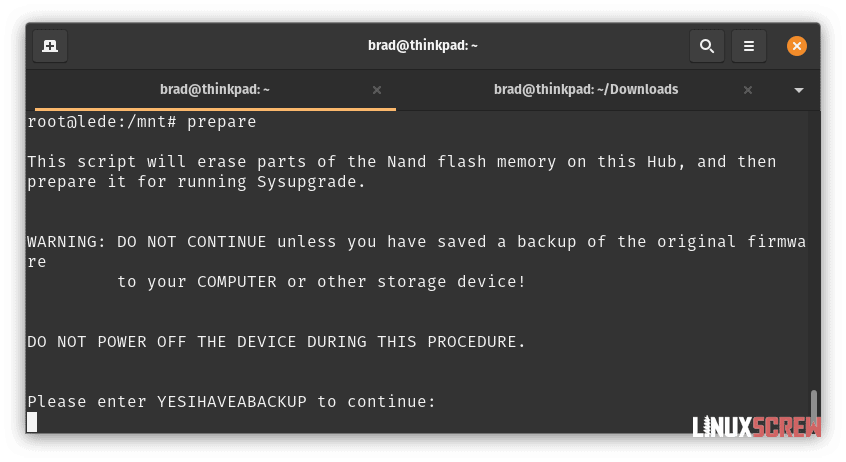
To prepare for the installation, run the following in the picocom window:
prepare
You will receive a warning – heed it!
…then type:
YESIHAVEABACKUP
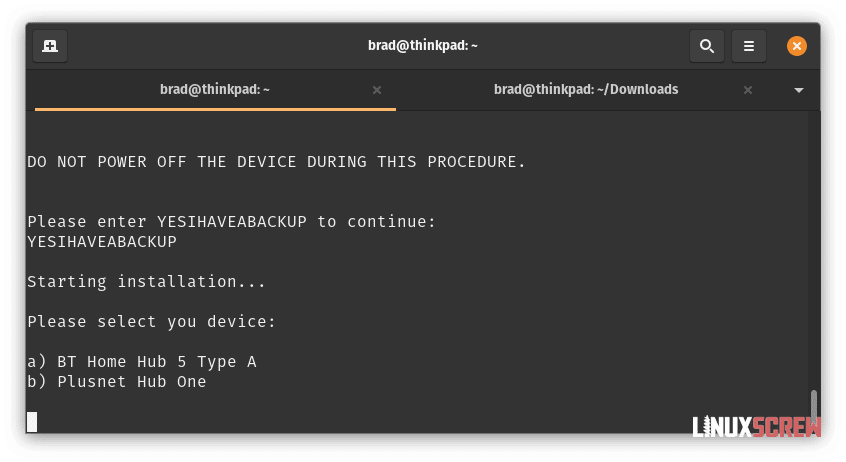
…then select which ISP supplied the router:
The install script will supply you with a command to run, which will look something like this:
sysupgrade /tmp/mounts/<directory>/lede-lantiq-xrx200-BTHOMEHUBV5A-squashfs-sysupgrade.bin
Ignore it! We’ve downloaded a file with a different name to make sure we have OpenWrt’s latest release.
Instead, run:
sysupgrade /tmp/mounts/USB-B1/openwrt-19.07.7-lantiq-xrx200-bt_homehub-v5a-squashfs-sysupgrade.bin
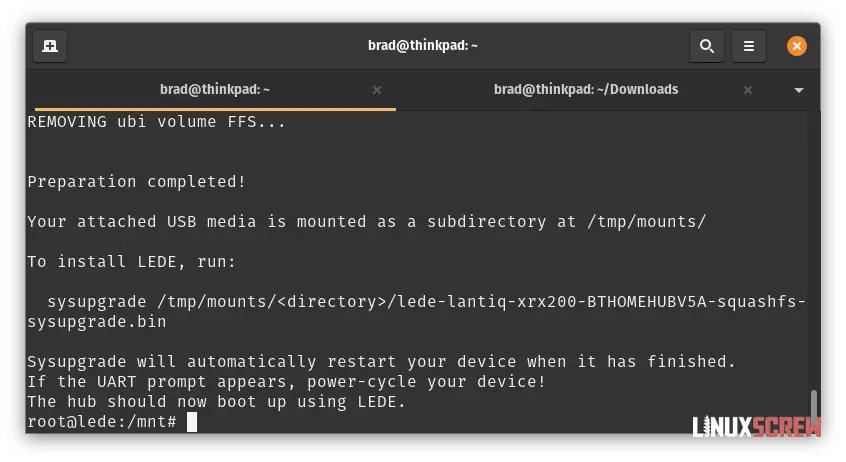
You may get the UART prompt again, or you’ll get a success message, and the device will reboot – either way, OpenWrt is installed!
Power off the device using the power button, remove the USB stick and serial cable and turn it back on.
If at any point during the installation it fails with the message:
Invalid sysupgrade file.
Image check 'platform_check_image' failed.
…try again with a different USB stick, re-download the OpenWrt release file, and try again – the verification process is very sensitive.
Restoring
If something goes really wrong (or just refuses to work), you can restore the stock firmware that was backed up by running the following command in the picocom window:
restore
Before doing this, ensure that the file
hh5a.nanddump
…which was backed up is present on the USB stick.
A warning, though – restoring takes a really long time.
Then, you can try it all again.
Accessing OpenWrt After Installation
Navigate to
http://192.168.1.1
…in your web browser, and you should see the login screen.
If you don’t, something went wrong. Check that you are connected to the router via ethernet, and if that doesn’t work, restore the stock firmware and try again.
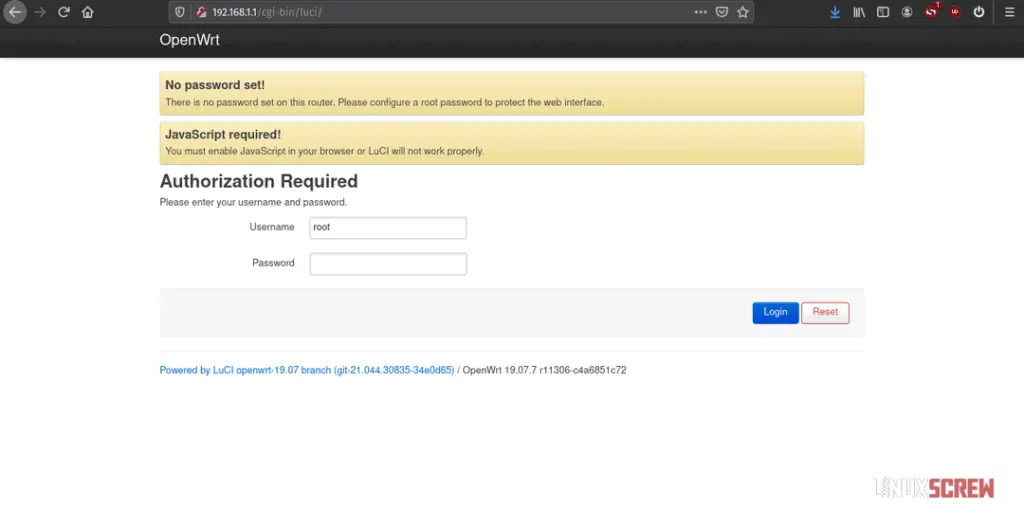
First thing you should do: Go go System -> Administration from the top menu and set a password!
Cleaning up – Purging tftpd from your System
Given that TFTP lacks authentication and is just running in the background on your Linux computer, you probably want to remove all traces of it before you go connecting to any public wifi network.
Remove tftpd and all configuration by running:
sudo apt purge tftpd-hpa
Then, remove the directory it was using to host files:
sudo rm -r /srv/tftp
You can now remove your static IP assignment if you did it through a GUI or reboot if you used the command line to assign one temporarily.
Using a Raspberry Pi Instead
If you’re not in the UK with access to a HomeHub and aren’t confident in finding a compatible router to upgrade, a Raspberry Pi is an easy (though less fun) alternative that doesn’t require soldering or unlocking.
To install OpenWrt on a Raspberry Pi, simply download the right install image for your Pi model from:
https://openwrt.org/toh/raspberry_pi_foundation/raspberry_pi#installation
…and use the Raspberry Pi Imager available at:
https://www.raspberrypi.org/software/
…to write the OpenWrt image to an SD card. Put the card in your Pi, and OpenWrt is ready to go!
So Far, So Good, Now What?!
Now you want to build a kickass network to kick start your home lab and learn some networking fundamentals. I’ll follow this article up with a bunch of things you can do with OpenWrt to make your network more useful and more secure.
Want to get a head start? Check out our article on IP addresses and calculating subnets.

Very interesting write up. Thank you so much for sharing your experience with us.
Thanks so much for writing this up Brad. It’s the most succint and complete guide I’ve read. So many ambiguities in many of the others online.
My OpenWRT installation went without a hitch. Looking forward to doing another and getting so meshed wifi VLANs on the go!
Glad it was helpful!
Yes, 100% agree with everything you wrote, thank you to the author.
Thx for the write up Brad very useful.
I ran into a couple of problems that are probably host machine specific but thought I would mention them in case it might help others…
At this point:
cat lede-lantiq-bthomehubv5a_ram-u-boot
Kept getting permission denied even when using sudo……..not sure of which of the following two actions fixed it but added my user to the Groups (dialout) and also had to change access permissions on ttyusb0 as follows “sudo chmod 666 /dev/ttyUSB0” – all then worked OK
Just couldn’t get the tftpd-hpa service to work correctly on my Linux host (Mint), the transfer just kept displaying TTT and would eventually time out. I made sure the image file was in the right directory and the appropriate permissions were in place and no firewall restriction etc but still same. Also tried with atftpd but similar results. Eventually loaded the SolarWinds tftp service on my windows PC and it worked straight away.
Thx again