This is part 2 of the Raspberry Pi and Python powered tank project. In this article, we attempt to display a live video stream and buttons to control the tank in a web UI.
In the Last Episode
In part 1, I gutted a toy tank and wired in a Raspberry Pi, and wrote some Python to make it move around.
Now, to write a remote control interface that runs in a web browser, with a live video stream and buttons to control the motors.
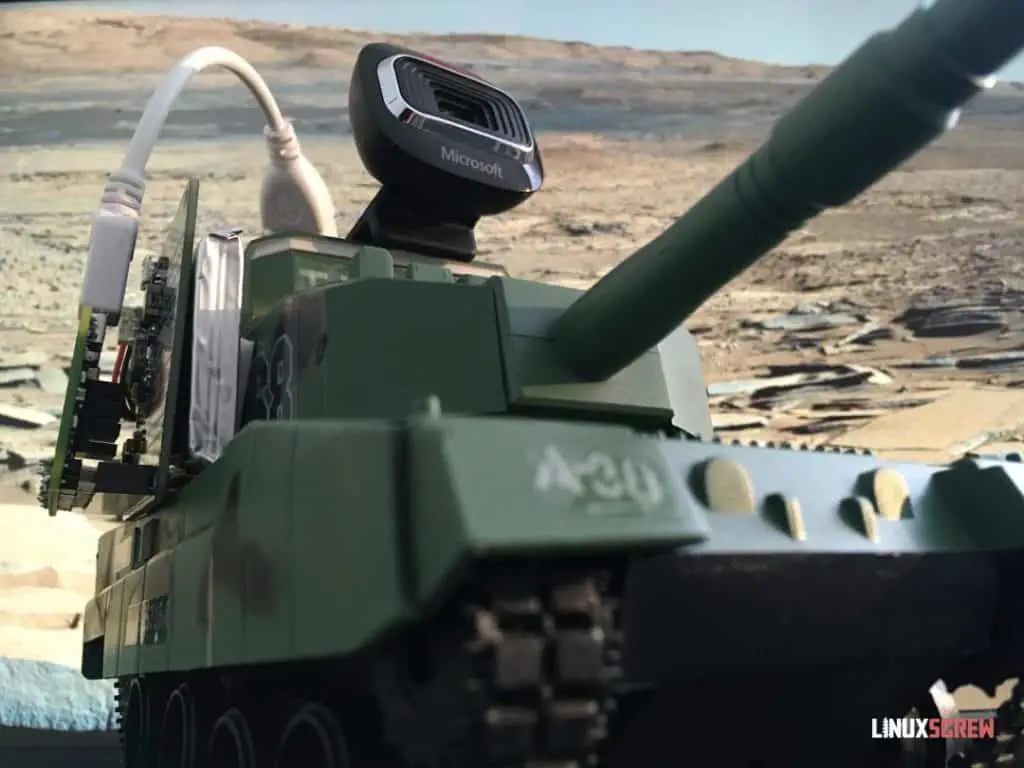
Miss part 1? Check it out here!
Take a look at some of my other Raspberry Pi and programming projects:
- Smart Mirror
- Wikipedia Scraper
- Photo Resizer and watermarker
- Raspberry Pi Powered Palmtop/Laptop
- Raspberry-Pi augmented Apple Macintosh
Bugs & Problems
Before I could get started on building a remote control interface for the tank, I had some problems to address that were found while testing things from part 1.
I’ll list the problems and what the cause was – it’s not very scientific, but it’ll be a help if you try to build something similar.
Slowness
The tank is slow to move!
- Is there a loose wire or short?
- No
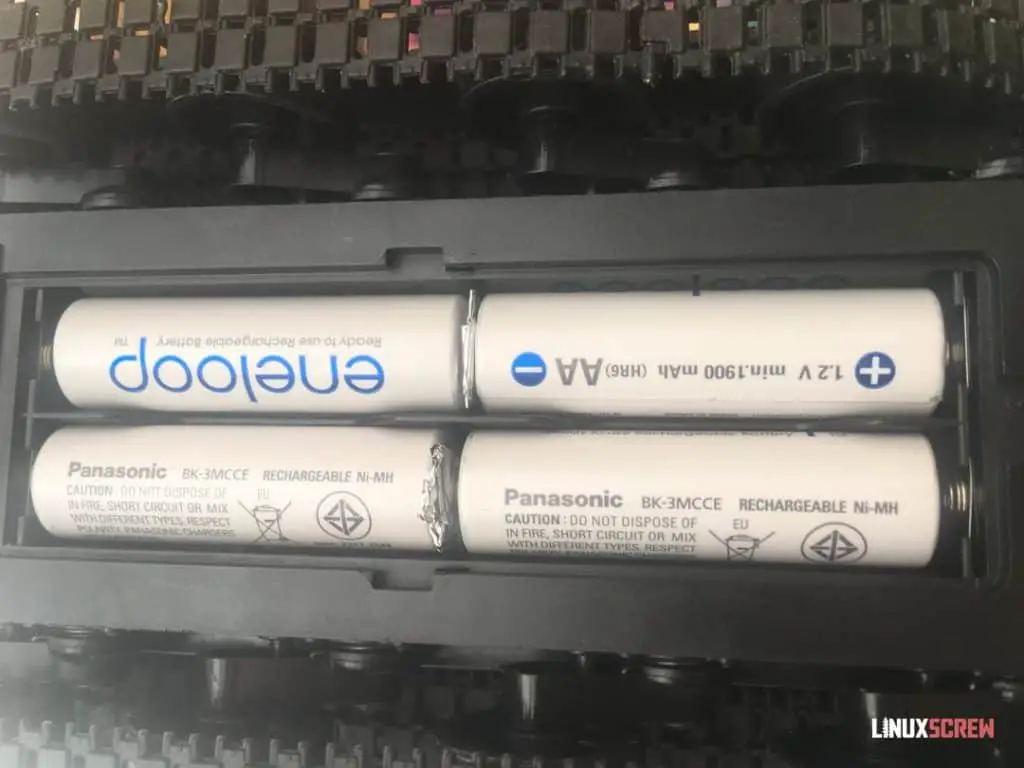
- Are the batteries making good contact in the battery compartment
- No! Some of the notches intended to hold the AA batteries in place were actually stopping them from touching each other.
- Added some squares of aluminum foil to make sure everything had good contact
- This improved things a bit
- Additional weight from the camera and Pi on the top of the tank probably doesn’t help.
- If I were to make a future revision, I’d use less heavy components and strip the camera’s case.
- This thing generally seems to eat batteries.
- Made sure they are fully charged, which obviously helps
- I Will have to tote around a bag of them if I want to use this away from a charger.
Webcam Availability
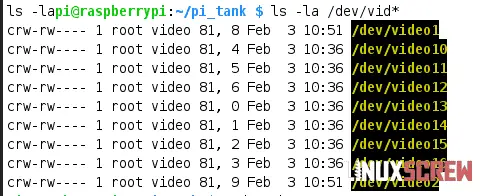
Webcam devices all have an ID in Linux, starting at 0.
In the code shown later in this article, I hardcoded the video feed to read from the first device(video0) – which seems sensible as there should only be one camera attached.
I ran into issues where often the camera wasn’t the first video device – duplicates from when the camera had been attached/detached were clogging things up.
This is probably an issue related to using a USB hub and would be less likely encountered using a Pi with onboard WiFi and a PiCam.
The Gun Still Doesn’t Work
The biggest disappointment for this project.
This, by all means, should work, as it’s the same DC motor as used to move the tank. However, the DC motor itself is dead (confirmed by trying to power it directly).
This is probably because of the water damage/state the tank arrived in mentioned in the previous article.
Still, I’m not going to tear down these projects because one aspect didn’t work; it is still an enjoyable tinkering process.
If I manage to get it to work, I’ll be sure to update here if there was anything necessary to make it happen.
On to the Remote Control Python Code
So the hardware (mostly) works – and we can spin the motors from Python.
Next up, I want to be able to control the motors and see out of the webcam on the tank remotely. The best thing to do this with is a web page with a video feed and some buttons.
OpenCV
OpenCV is a computer vision package for interacting with the webcam. The Python library for OpenCV can be installed using pip – but you’ll run into problems when packages OpenCV depends on haven’t been installed.
Install it with apt – all dependencies will be installed with it:
sudo apt install python3-opencv
Python & Flask
Flask is a web framework for Python that serves up HTML pages over a network, allowing you to integrate Python logic to generate the content for those pages.
I’ll use Flask to serve up a page with some control buttons, which will use Python code to read from the web camera and output the video feed as well as trigger the Python to run the engines.
To install flask for Python 3, run:
sudo pip3 install flask
If you don’t have the pip package manager installed, check out our article here.
The previous article should cover other Python dependencies.
As you tinker with the below code, keep in mind that any camera or GPIO issues are often solved by just rebooting. It’s not technical, but it makes sure everything is freed up before you start trying to figure out what went wrong.
Python Code
Create a file called remote.py in the same project directory where tank.py was created in Part 1.
Then, paste in the following code, give it a read, and save it:
# This script tested for use with Python 3
# This script starts a web server, so needs to be run as root or using sudo
# This application will be available by accessing http://<your raspberry pi ip address>:5000

from flask import Flask, Response, render_template
import cv2
import l293d.driver as l293d
import threading
import sys

# Initialise Flask, the Python web server package which serves all of this up to a browser
app = Flask(__name__)

# Define global variables for future use
# They are initialized to None so that we can confirm they have been set up later

global camera
camera = None

global motorLeft
global motorRight
global motorGun
motorLeft = None
motorRight = None
motorGun = None

# Use BOARD pin numbering - ie the position of the pin, not the GPIO number.  The L293D doesn't seem to like using BCM numbering.
l293d.Config.pin_numbering = 'BOARD'

# Link to the L293D library documentation
# https://l293d.readthedocs.io/en/latest/

# Note: the L293D library does generate some errors that GPIO channels already exist when running commands in quick succession, but it doesn't seem to affect functionality

# Link to Pi Zero pinout
# https://i.stack.imgur.com/yHddo.png

# Setup function to set up camera, motors - only runs once, but nice to have them all contained in one place
def setup():

    global camera
    global motorLeft
    global motorRight
    global motorGun

    en1 = 22 # GPIO 25
    in1 = 18 # GPIO 24
    in2 = 16 # GPIO 23
    # out1 to left motor
    # out2 to left motor

    en2 = 23 # GPIO 11
    in3 = 21 # GPIO 9
    in4 = 19 # GPIO 10
    #out3 to right motor
    #out4 to right motor

    #Second l293d for GUN
    g_en1 = 8 # GPIO 14
    g_in1 = 10 # GPIO 15
    g_in2 = 12 # GPIO 18
    # out1 to gun motor
    # out2 to gun motor

    try:
        print("motorLeft coming online...")
        motorLeft = l293d.DC(en1, in1, in2, force_selection=True)
        print("motorRight coming online...")
        motorRight = l293d.DC(en2, in3, in4, force_selection=True)
        print("motorGun coming online...")
        motorGun = l293d.DC(g_en1, g_in1, g_in2, force_selection=True)

        camera = cv2.VideoCapture(0)
    except:
        # If there is an error, make sure we clean up any pin assignments
        cleanup()

# Cleanup function to release the camera and GPIO pins ready for the next time
def cleanup():

    print('Done, cleaning up video and GPIO')
    camera.release()
    cv2.destroyAllWindows()
    l293d.cleanup()
    sys.exit("Cleaned up") # Make sure the application exits after a cleanup in case it was called due to an error

# Function to generate frames from the camera using the cv2 library
def generateFrames():  # generate frame by frame from camera

    # Ensure the global camera variable is used in this scope
    global camera

    # Only try to generate frames if the camera variable has been populated
    if camera:
        while True:
            # Capture frame
            success, frame = camera.read()  # Reads the camera frame
            if not success:
                break
            else:
                ret, buffer = cv2.imencode('.jpg', frame)
                frame = buffer.tobytes()
                yield (b'--frame\r\n'
                    b'Content-Type: image/jpeg\r\n\r\n' + frame + b'\r\n')  # Concat frame one by one and show result

# @app.route decorators tell flask which functions return HTML pages

# Video streaming route - should output an the live video stream
# A note to that Reddit commenter - unfortunately latency wasn't a consideration here - it's probably pretty laggy
@app.route('/video_feed')
def video_feed():
    return Response(generateFrames(), mimetype='multipart/x-mixed-replace; boundary=frame')

# Main/index route - the page that loads when you access the app via a browser
@app.route('/')
def index():
    return render_template('index.html') # Ensure that index.html exists in the templates subdirectory for this to work

# Control routes - these routes will be hit when the related link is pressed from index.html

@app.route('/control_stop')
def control_stop():

    # Ensure the global motor* variables are used in this scope
    global motorLeft
    global motorRight

    # Only attempt to interact with the motors if the variables have been successfully populated
    if motorLeft and motorRight:

        motorLeft.stop()
        motorRight.stop()

        # As we've stopped, it's a good time to clean up any hanging threads
        for thread in threading.enumerate():
            print(thread.name) # Seems like the l293d library is cleaning up after itself.  I'll list the threads on stop anyway so I can see if they do require cleaning up

    # Return an empty (successful) response regardless of what happened above
    return Response("", mimetype='text/plain')

@app.route('/control_forward')
def control_forward():

    global motorLeft
    global motorRight

    if motorLeft and motorRight:

        # The motor clockwise/anticlockwise functions are blocking - they'll run indefinitely or for a given amount
        # of time, but code after will not resume until they are done.
        # To run two of these functions simultaneously, they'll need to run in separate threads, so that code can continue executing while they run.
        # All motor actions will run for a few seconds - if things are just left to spin the tank is too  hard to control
        threading.Thread(target = motorLeft.clockwise(duration=4)).start()
        threading.Thread(target = motorRight.clockwise(duration=4)).start()

    return Response("", mimetype='text/plain')

@app.route('/control_back')
def control_back():

    global motorLeft
    global motorRight

    if motorLeft and motorRight:

        motorLeft.stop()
        motorRight.stop()

        threading.Thread(target = motorLeft.anticlockwise(duration=2)).start()
        threading.Thread(target = motorRight.anticlockwise(duration=2)).start()

    return Response("", mimetype='text/plain')

@app.route('/control_turn_right')
def control_turn_right():

    global motorLeft
    global motorRight

    if motorLeft and motorRight:

        motorLeft.stop()
        motorRight.stop()

        threading.Thread(target = motorLeft.clockwise(duration=2)).start()
        threading.Thread(target = motorRight.anticlockwise(duration=2)).start()

    return Response("", mimetype='text/plain')

@app.route('/control_turn_left')
def control_turn_left():

    global motorLeft
    global motorRight

    if motorLeft and motorRight:

        motorLeft.stop()
        motorRight.stop()

        threading.Thread(target = motorLeft.anticlockwise(duration=2)).start()
        threading.Thread(target = motorRight.clockwise(duration=2)).start()

    return Response("", mimetype='text/plain')

@app.route('/control_fire')
def control_fire():

    global motorGun

    if motorGun:

        motorGun.clockwise(duration = 3) # Spin the gun motor for 3 seconds - should send a few shots down range!

    return Response("", mimetype='text/plain')

# Launch the Flask web server when this script is executed
# Catch KeyboardInterrupt so that if the application is quitting, cleanup can be run
try:

    if __name__ == '__main__': # If the script is being run directly rather than called by another script

        # Make sure setup only runs once at launch, otherwise you'll get errors as the camera/GPIO are already in use
        setup()

        # Start the flask app!
        app.run(host='0.0.0.0', port=5000, debug=True, use_reloader=False)
        # App is run WITHOUT threading to reduce the chance of camera/GPIO conflict - only one concurrent user is expected, so this is fine
        # Debug is enabled so we can see what's happening in the console
        # However, the app automatically reloads when debug=True, which causes camera/GPIO conflicts, so this is disabled with use_reloader=false
        # This application will be available by accessing http://<your raspberry pi ip address>:5000

except KeyboardInterrupt:

    pass

finally:

    # Ensure cleanup on exit
    cleanup()

# End of file!
HTML Template
Create an additional directory called templates in the same folder as above, and create a file called index.html in it, with the below content:
<!doctype html>
<html lang="en">
    <head>
        <meta charset="utf-8">
        <meta name="viewport" content="width=device-width, initial-scale=1">
        <title>PyTank!</title>
    </head>
    <body>

        <!-- You could add some CSS here to make bigger buttons, or overlay them on a full screen video feed, but I've kept things as simple as possible for readability -->

        <h3>Python Powered Tank Control</h3>

        <!-- This is the video feed - the URL is populated by Python/Flask -->
        <img src="{{ url_for('video_feed') }}" style="width: 500px;">

        <hr/>

        <!-- Navigation buttons. -->
        <!-- When clicked, each button accesses the control URL/route from Python/Flask -->
        <!-- This is done using the JavaScript fetch() method, which simply retrieves a given url.  In this case, nothing is done with the response -->
        <a href="#" onclick="fetch('{{ url_for('control_forward') }}')">Forward</a>
        <a href="#" onclick="fetch('{{ url_for('control_back') }}')">Backwards</a>
        <a href="#" onclick="fetch('{{ url_for('control_turn_left') }}')">Turn Left</a>
        <a href="#" onclick="fetch('{{ url_for('control_turn_right') }}')">Turn Right</a>
        <a href="#" onclick="fetch('{{ url_for('control_stop') }}')">Stop</a>
        <a href="#" onclick="fetch('{{ url_for('control_fire') }}')">Fire!</a>

    </body>
</html>
The templates directory is the pre-configured location flask will look in for webpage template files.
Launching the Script
As flask is going to be running a web server, it needs to be run with root privileges as it will be opening ports for the web content to be served on.
So, run the following via SSH to kick things off:
sudo python3 remote.py
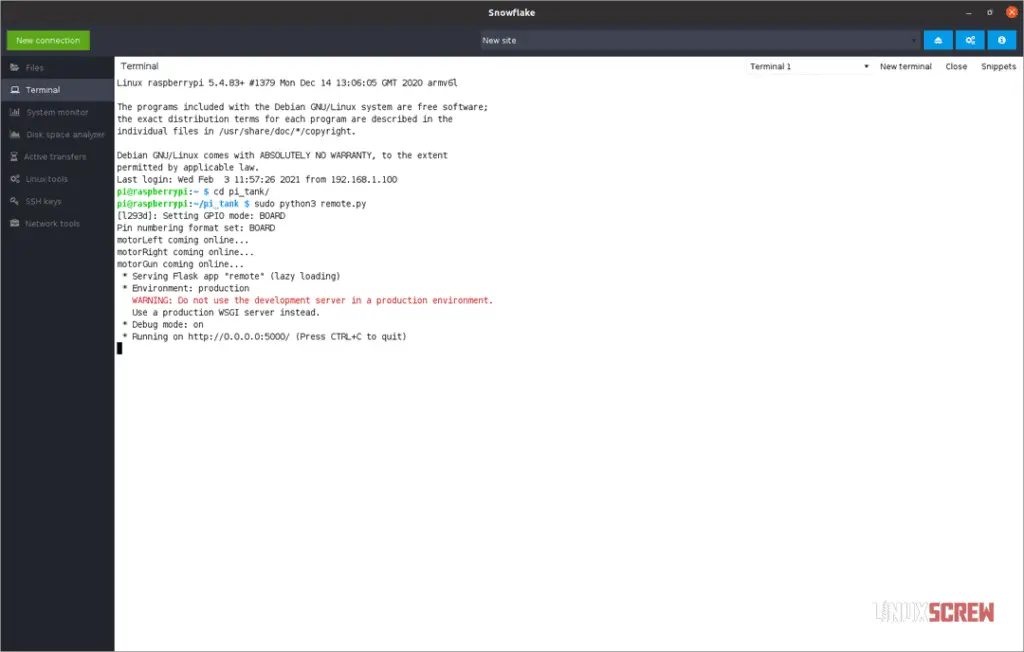
An SSH session will have to be left open for now to keep the webserver running, but it could be run in the background on boot.
Action!
Here it is, running in Firefox in Linux:
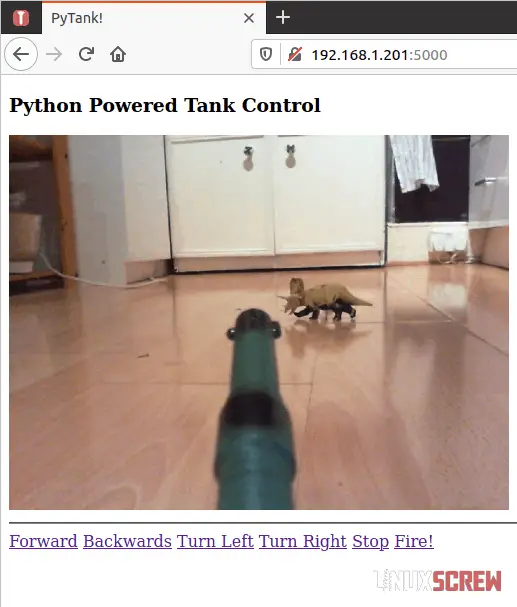
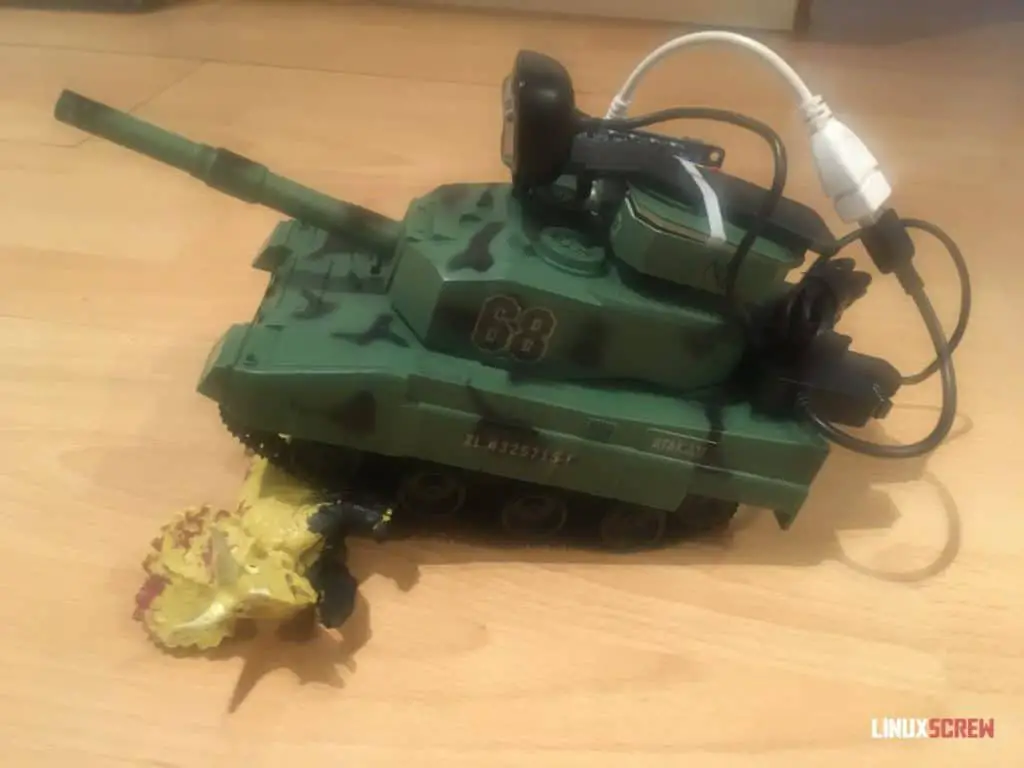
Wonky. Wonky but fun to mess with. With the gun not functioning, I had to use the fender.
Improvements
There are a few bugs that pop up sporadically – Python isn’t my first (or second) language, so there’s plenty of room for improvement. I’ve plundered Stack Overflow to get things running as smoothly as possible for a Saturday project – perfection has by no means been reached.
Things I’d work on in a second revision:
- A Python function to clear and re-initialize camera and GPIO to alleviate any issues without having to reboot
- An HTML dropdown to select camera, in case phantom devices show up
- Rebuild with a Raspberry Pi Zero W and a PiCam so that the USB hub could be removed, and things would be much lighter (and use less power)
- Better batteries
- Style up the remote control interface
L293D
I’ve seen some discussions that say the L293D is great for driving two motors but not so great at driving two motors simultaneously. If there’s a future revision, I’ll probably switch it up so that each L293D in the tank drives its own motor, and the first L293D will then drive the gun.
The Python code would be altered so that the tank can’t drive/fire simultaneously; that way, each L293D can drive a single motor simultaneously for full forward/reverse. This may yield better performance.
Signing Off
I’m pretty new to DIY electronics, so I’d be interested to see what improvements could be made while keeping this project relatively cheap/simple. This isn’t really meant to be a guide to be strictly followed – just a journal of my tinkering on this particular project.
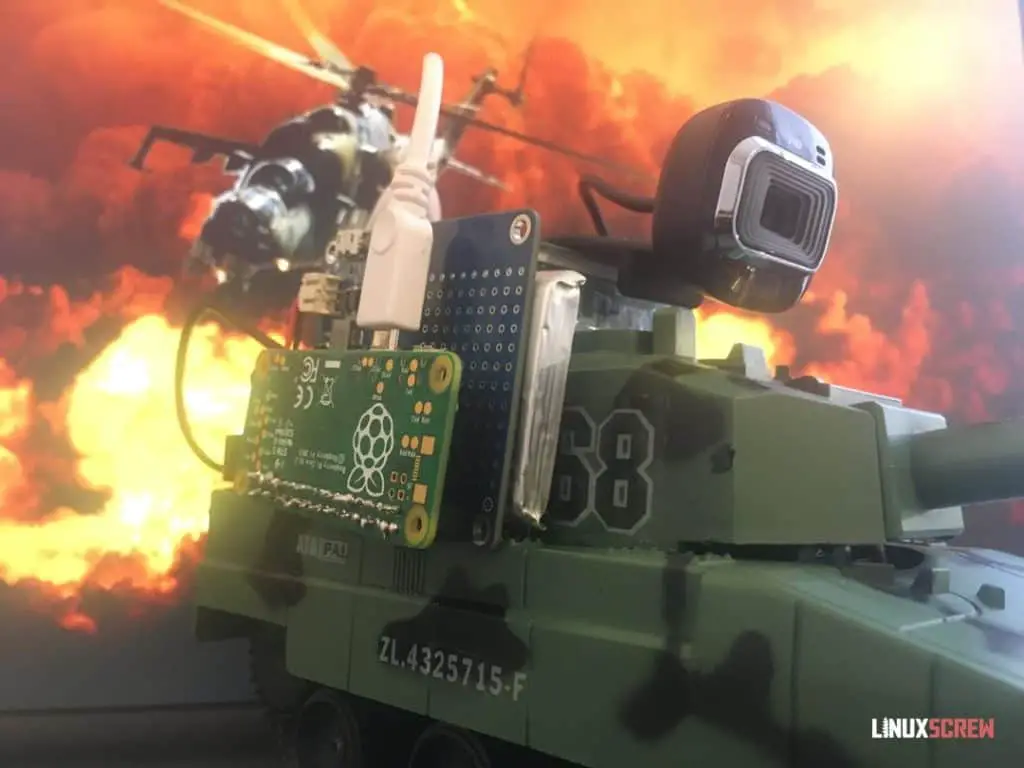
If you attempt something similar, drop a comment! With some better quality parts, you could probably create something pretty robust for exploring outdoors. I’d be interested in seeing how others approach the problems encountered for a possible second revision.
When the weather clears up, and we’re allowed outside again, I might check back with some footage of the tank navigating the streets of London, or at least chase some pigeons with it at the park.

